Guidelines for using the RCAP Schools online enrollment portal
If you are a NEWLY ADMITTED STUDENT, your RCAP school may have sent you an email indicating your assigned Student Number and Temporary Password. Use these credentials to log in to the enrollment portal for the FIRST TIME. After your first successful log in, you will be asked to change the password to your choice of password, which you will use when you subsequently log in to the portal.
If you are a RETURNING STUDENT, use the following credentials to log in to the enrollment portal for the FIRST TIME:
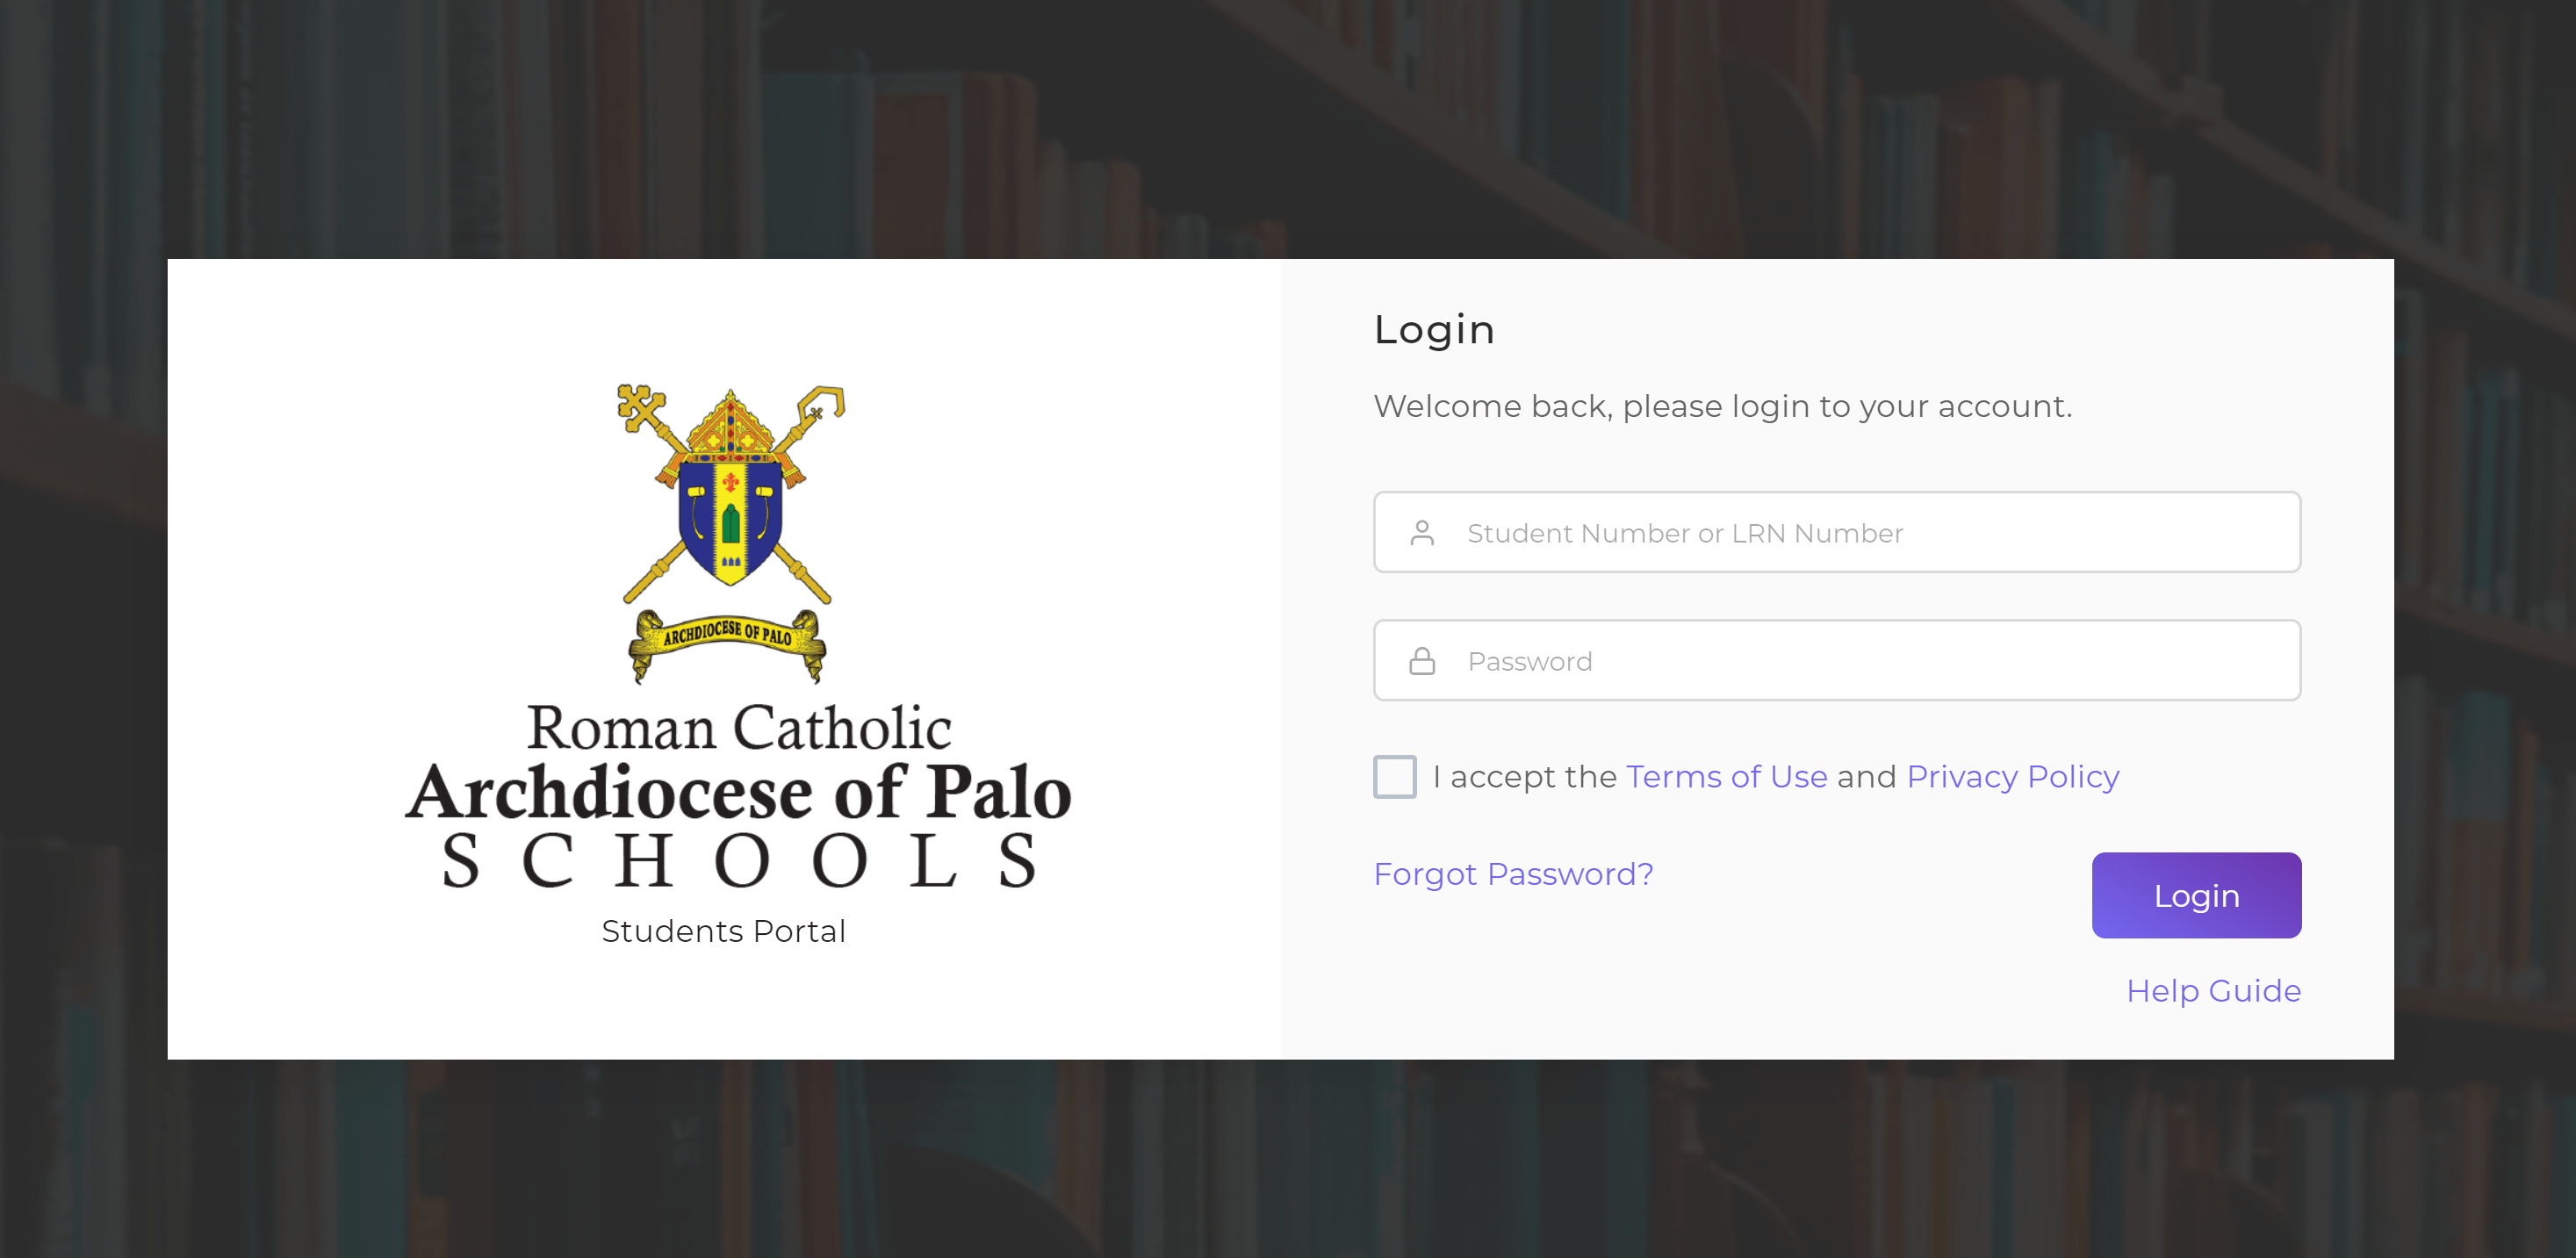
Go to https://students.rcapschools.org/
For Student Number: Type your current student number or your LRN number
For Default Password: Type your date of birth in MMDDYYYY format
(Example: if your date of birth is April 3, 2008, type 04032008)
After your first successful log in, you will be asked to change the password to your choice of password, which you will use when you subsequently log in to the portal.
Check the box corresponding to the clause “I accept the Terms of Use and Privacy Policy”. Click “Login”.
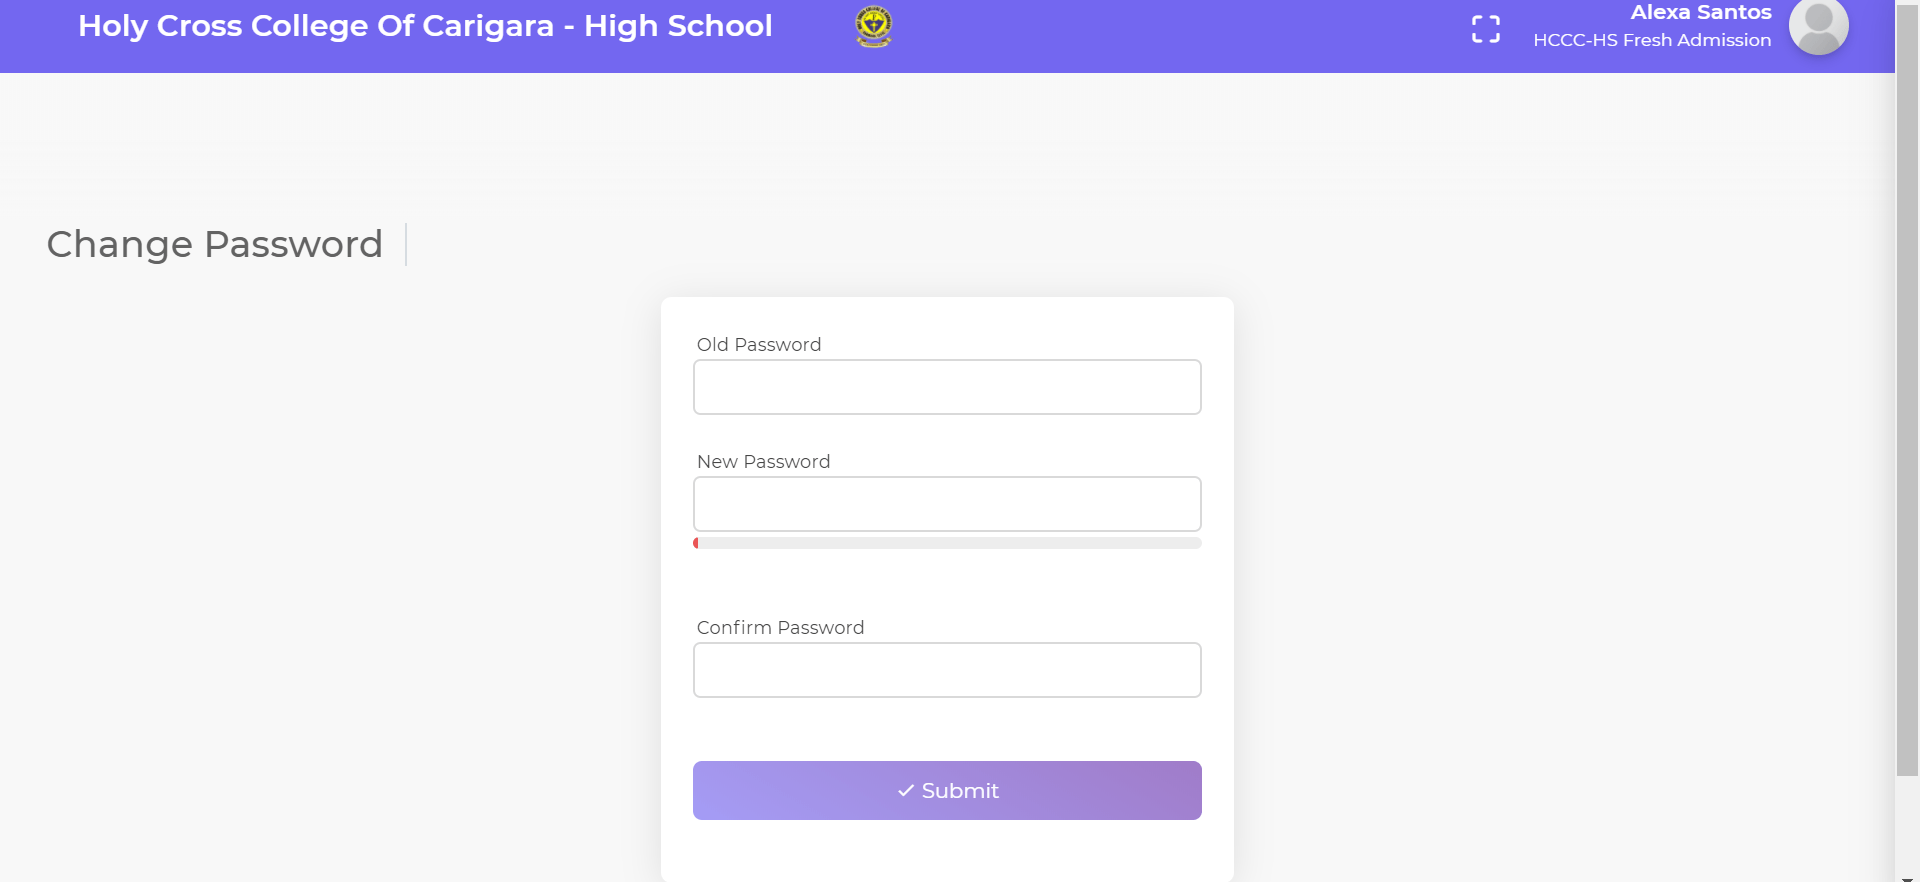
After logging in for the FIRST TIME, you will be directed to the “Change Password” page.
For Old Password, type the default password you used to log in in Step 1.
For New Password, type your choice of new password. (This will be your password moving forward, so remember this new password).
Type the new password again in the Confirm Password box.
Click “Submit”.
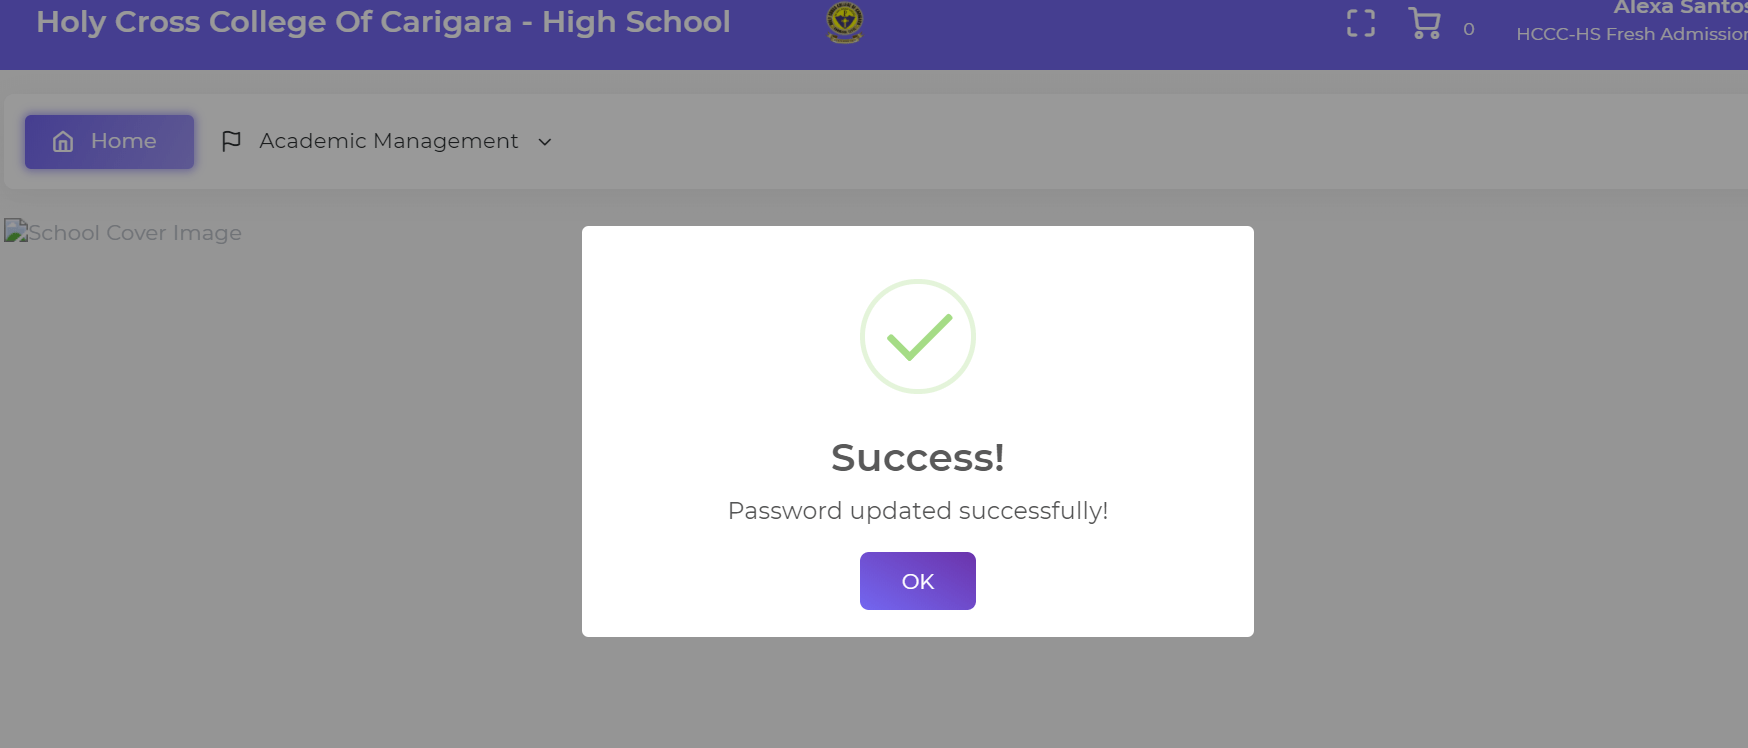
If you are a NEWLY ADMITTED STUDENT, after successfully changing your password, a pop-up Success! message will appear. Click “OK”.

If you are a RETURNING STUDENT, you will be asked to verify your email first before you can access your account. After successfully changing your password, a pop-up Warning! message will appear, stating that you need to verify your email first to use your account. Click “OK”.

You will be directed to the “Alert Setup” page, where you will be asked to verify your email first to use your account.
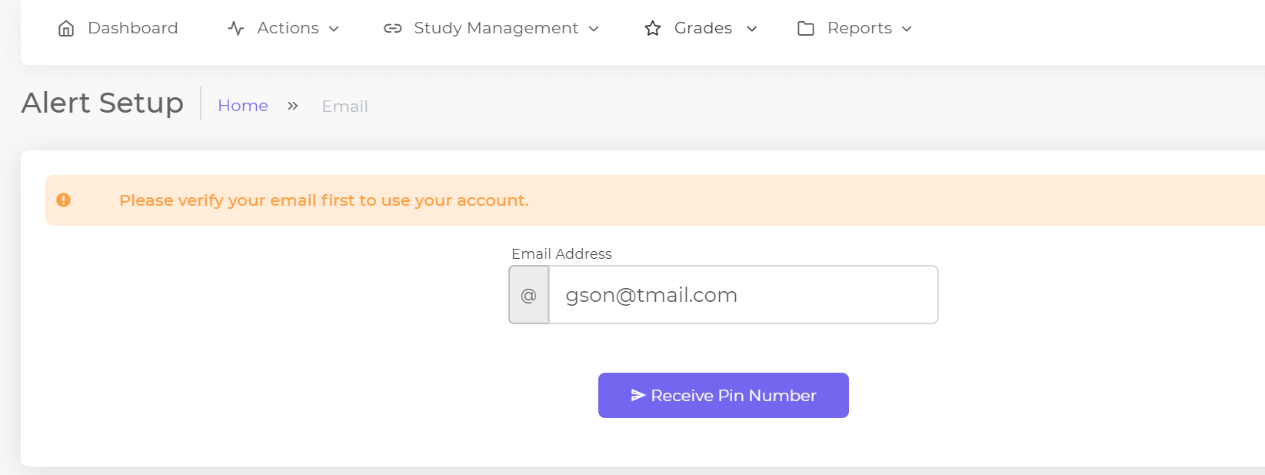
Check that the email address indicated in the email address box is your correct email address. Click Receive Pin Number.

A message containing the requested Pin Number will be sent to your email address. Check your email immediately (the Pin Number will expire in 1 hour). The message will look like the example below:
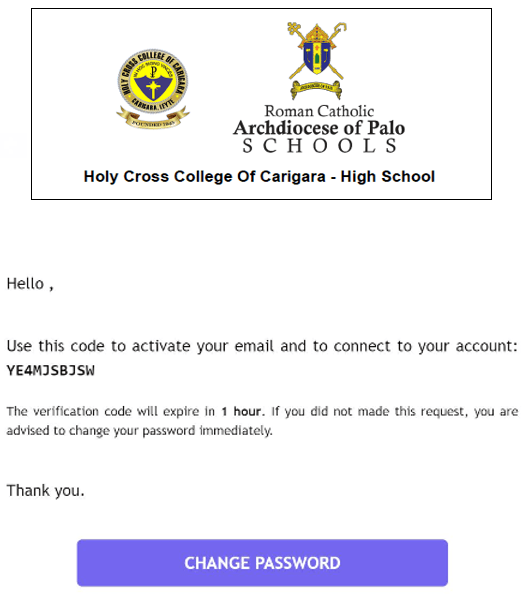
Type the Pin Number in the Pin Number box. Click Verify Pin Number.
After successfully verifying your email address and updating your password, a pop-up Success! message will appear. Click “OK”.
IMPORTANT NOTE ABOUT EMAIL ADDRESS: The email address for each student must be unique and different from every other student. In other words, each Student Number must correspond to a unique email address, which will be used to provide updates, password resets, and various other information relating to that particular student. If there are two or more siblings attending the same school, please use a unique email address for each sibling.
You will be automatically directed to the homepage of your selected RCAP school. You should see the correct RCAP school in the upper left corner of the page. Note that your name appears in the upper right corner of the page.

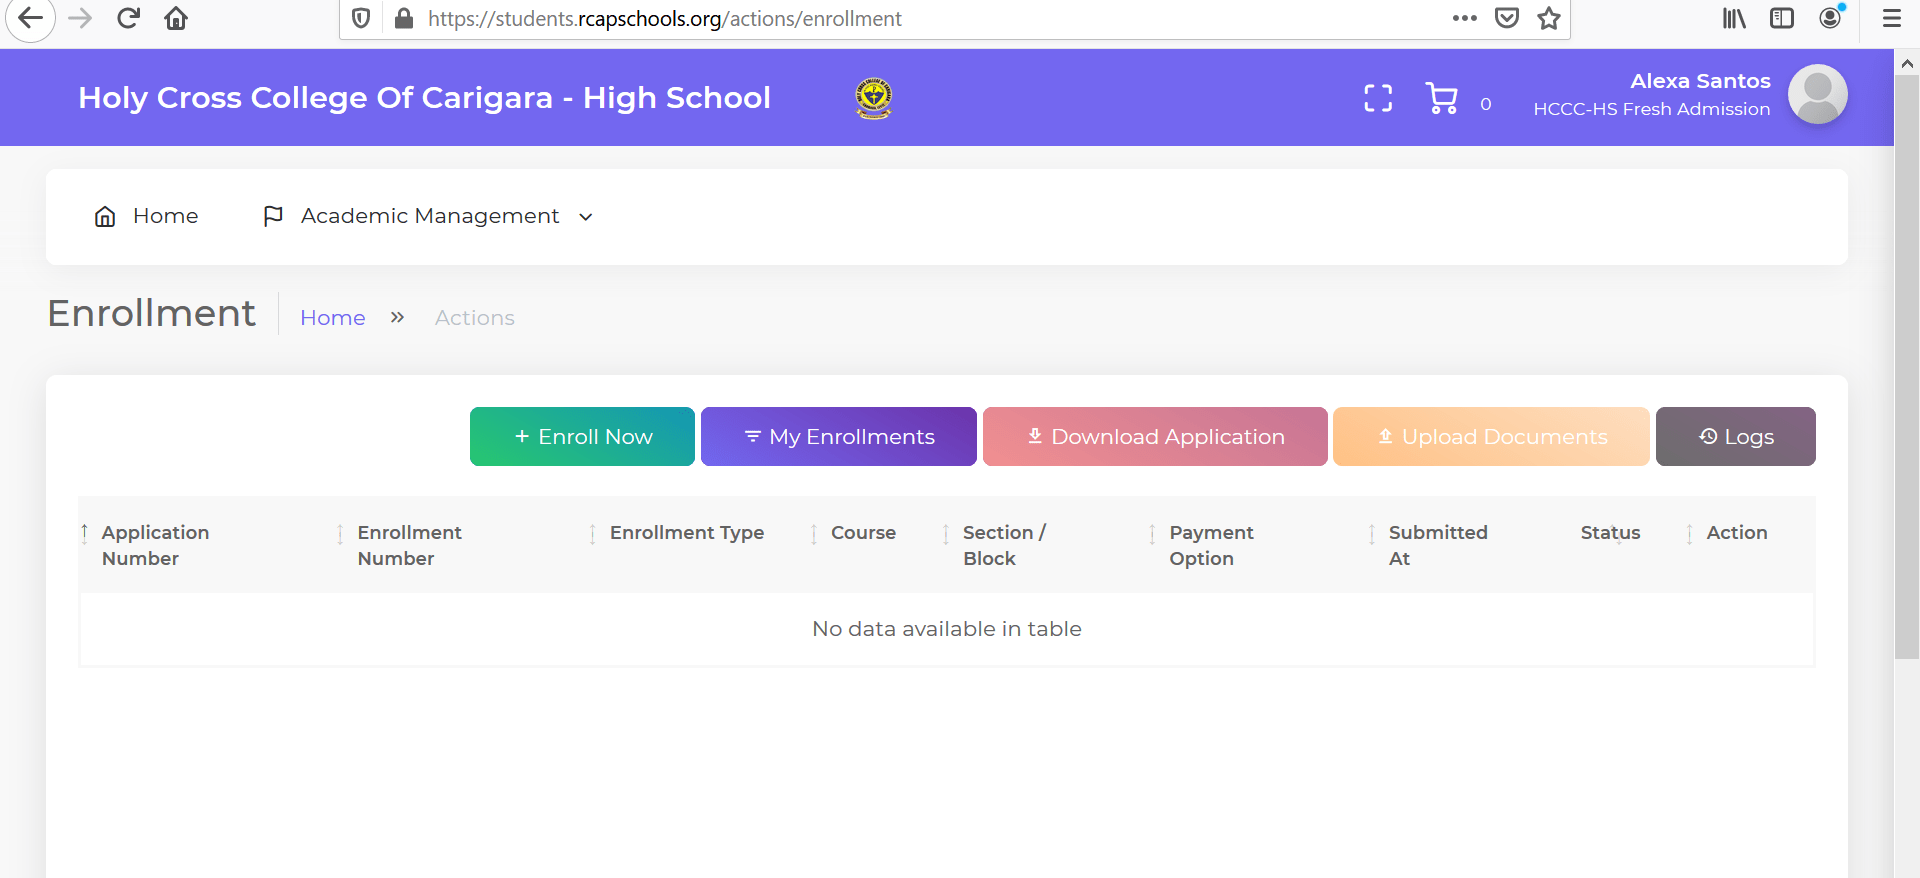
Click Academic Management to reveal a menu of activities or sites to select from. You will see “Enrollment” in the menu. To enroll for your classes, click Enrollment.

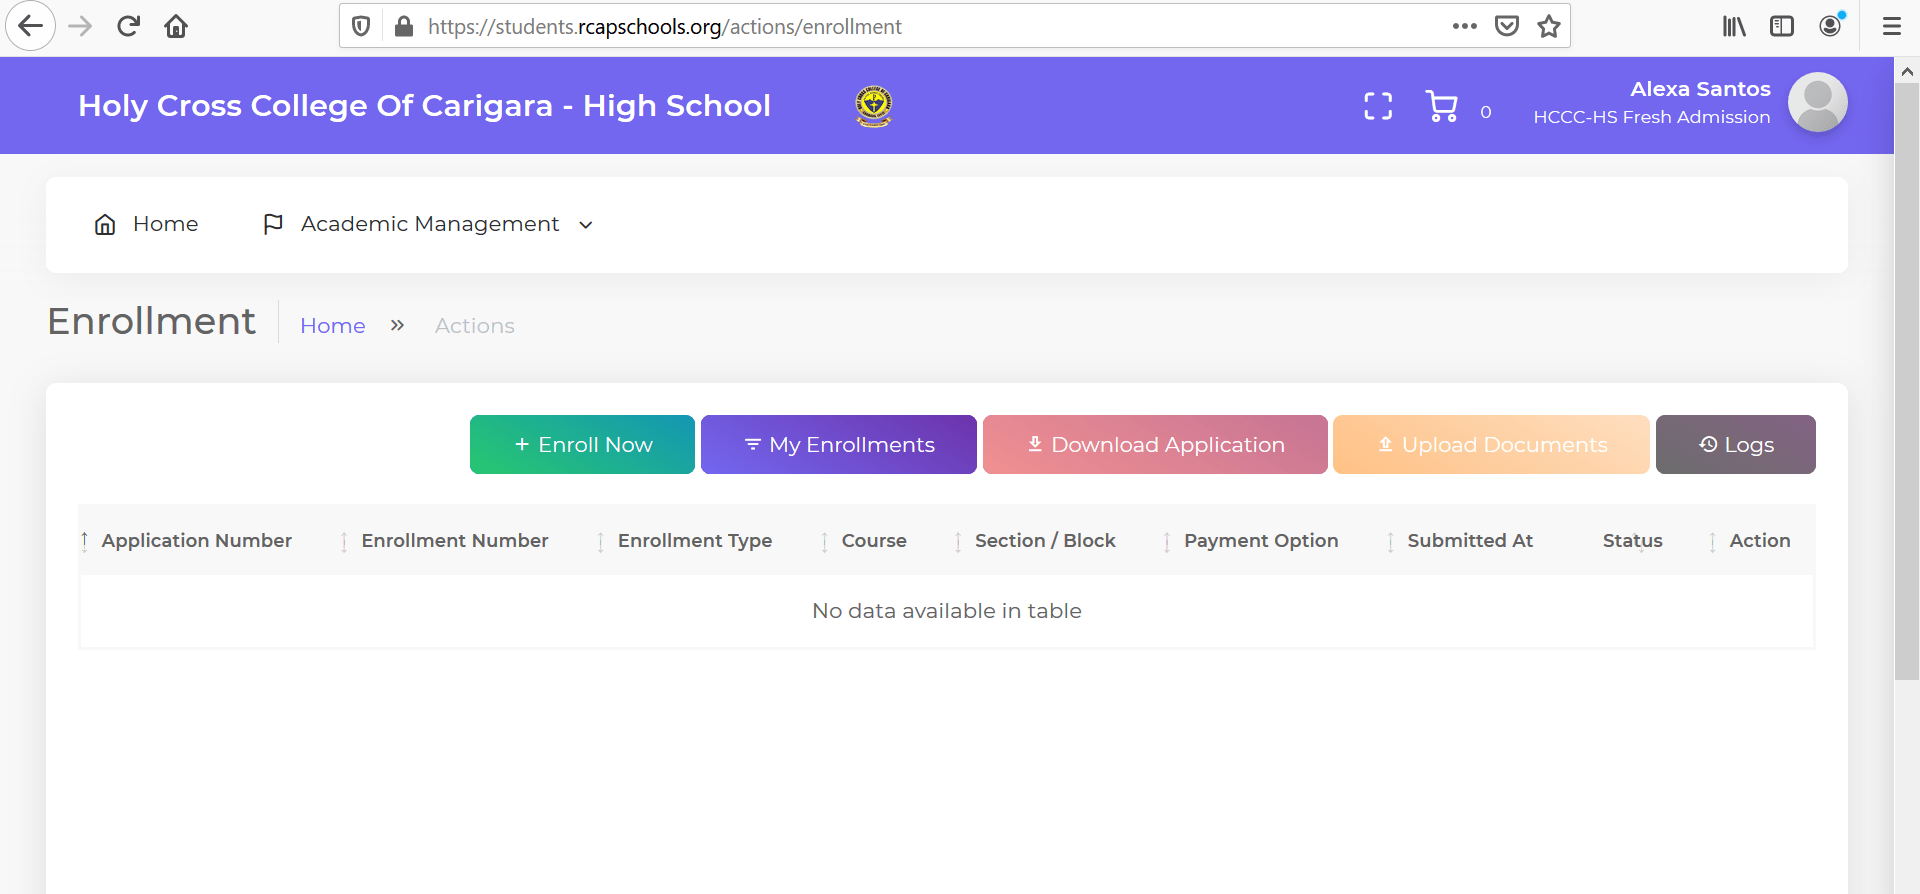
After clicking “Enrollment”, you will be directed to the Enrollment page. Click Enroll Now.
After clicking “Enroll Now”, you will be directed to this page where you provide information for your Personal Details. Some of the required information have been auto-populated by the system. It is advisable that you check that the information supplied is correct. Correct any incorrect information, and fill in all the missing information. Do not leave any field blank; if information is not applicable, type “N.A.” Click “Next” to move to the next page.

You will be directed to this page where you provide information for your Parent/Guardian Details. Some of the required information have been auto-populated by the system. It is advisable that you check that the information supplied is correct. Correct any incorrect information, and fill in all the missing information. Do not leave any field blank; if information is not applicable, type “N.A.” Click “Next” to move to the next page.

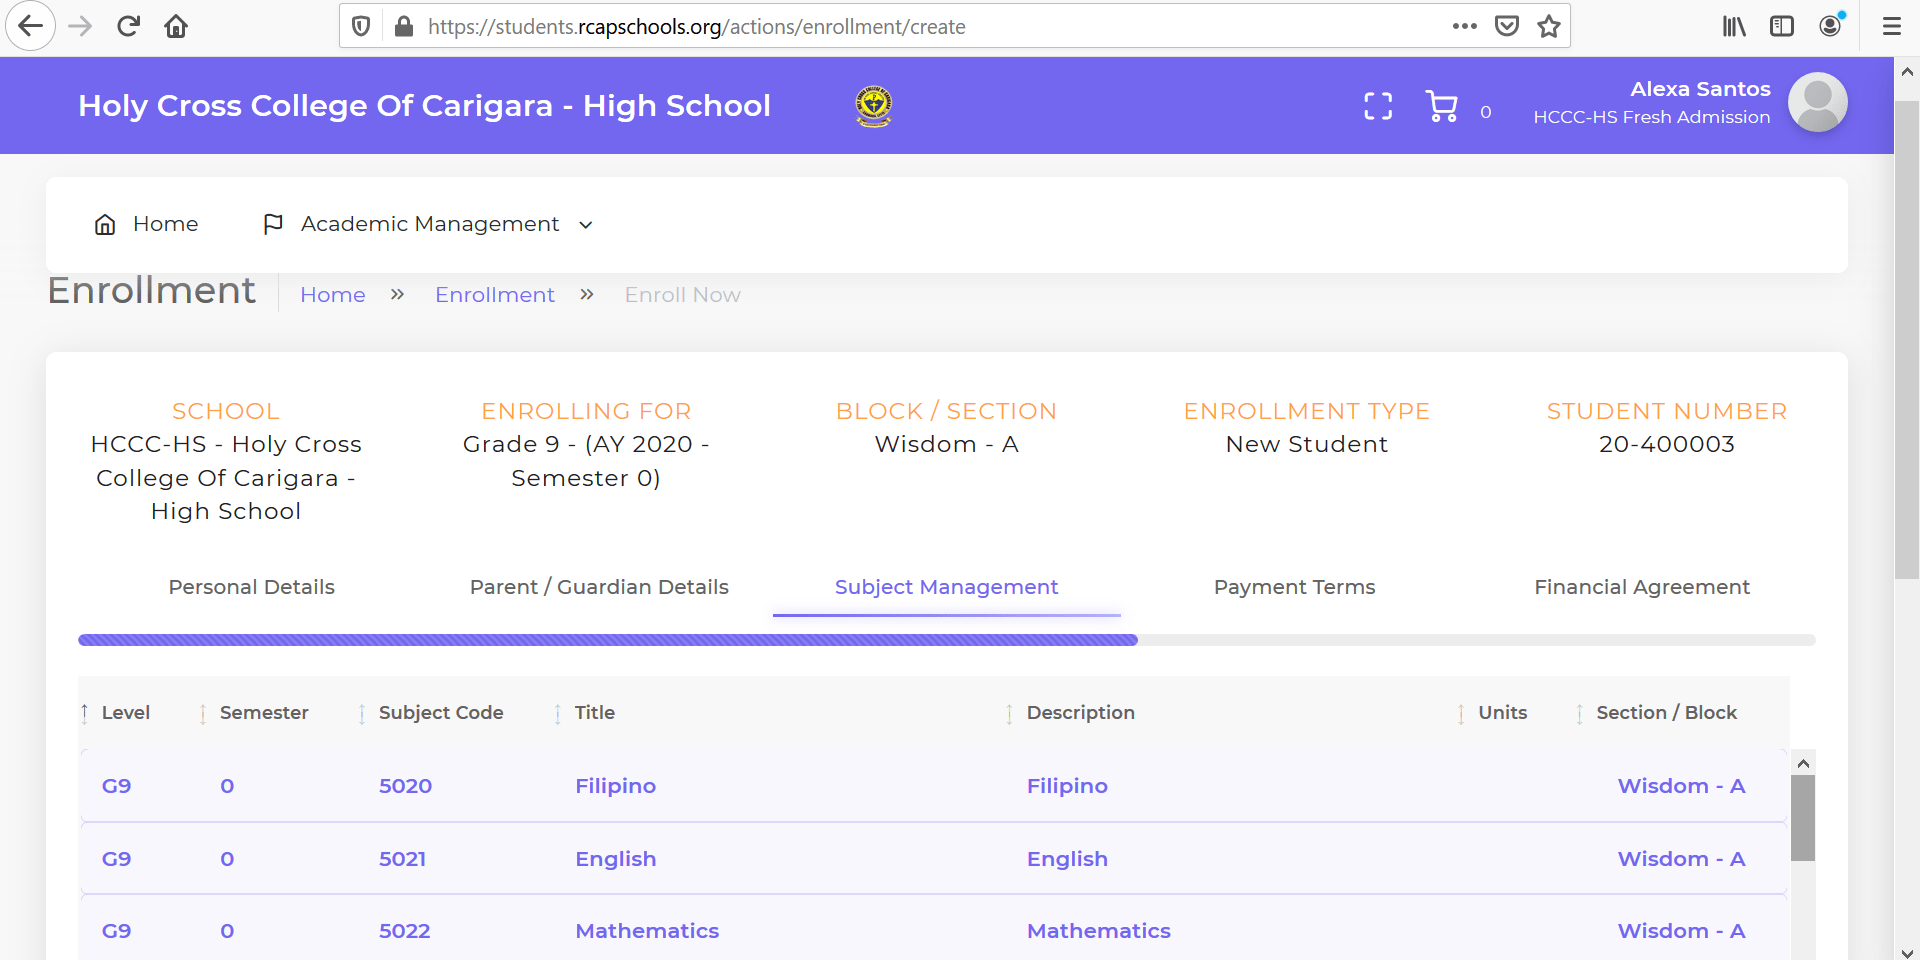
You will be directed to the Subject Management page where you can view your assigned subjects. Scroll down to view the rest of the subjects. Click “Next” to move to the next page.
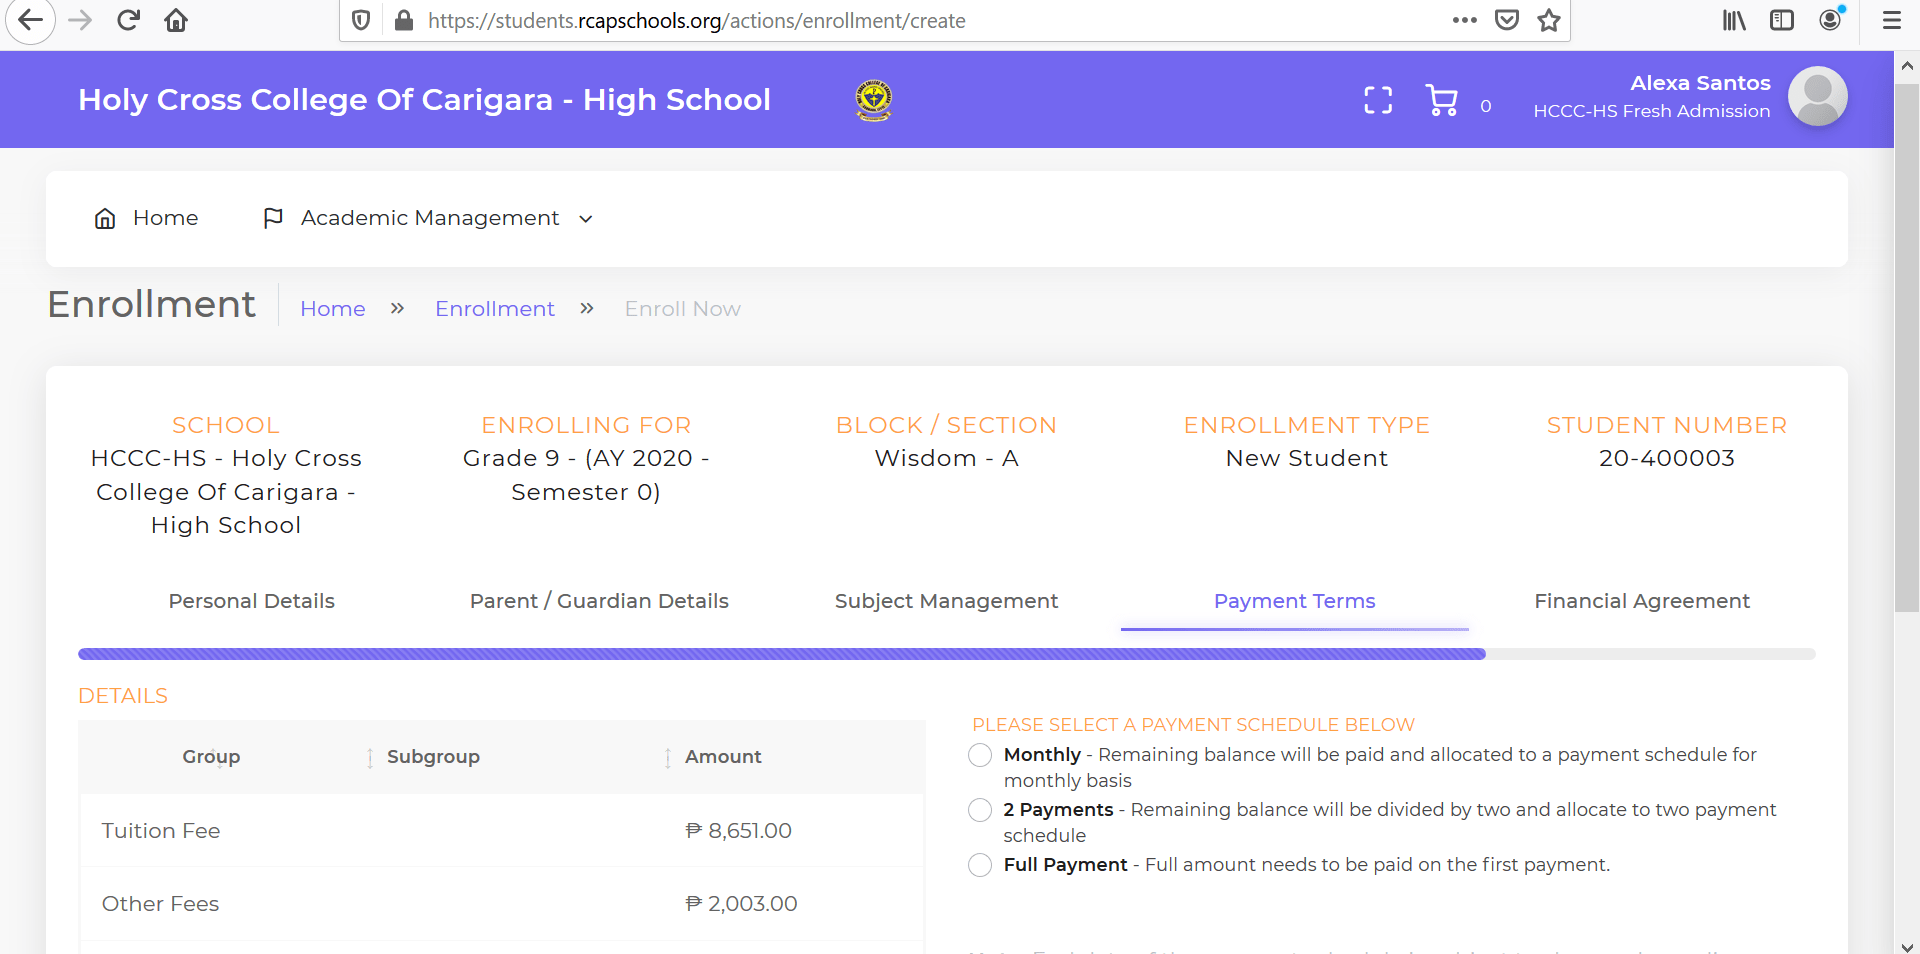
You will be directed to the Payment Terms page where you can view the details of all fees payable. To the right of the fee details, select your preferred payment schedule: Monthly, 2 Payments, or Full Payment. Then, select your preferred mode of payment: Cash, Bank Deposit, or Credit Card (if applicable). Click “Next” to move to the next page.
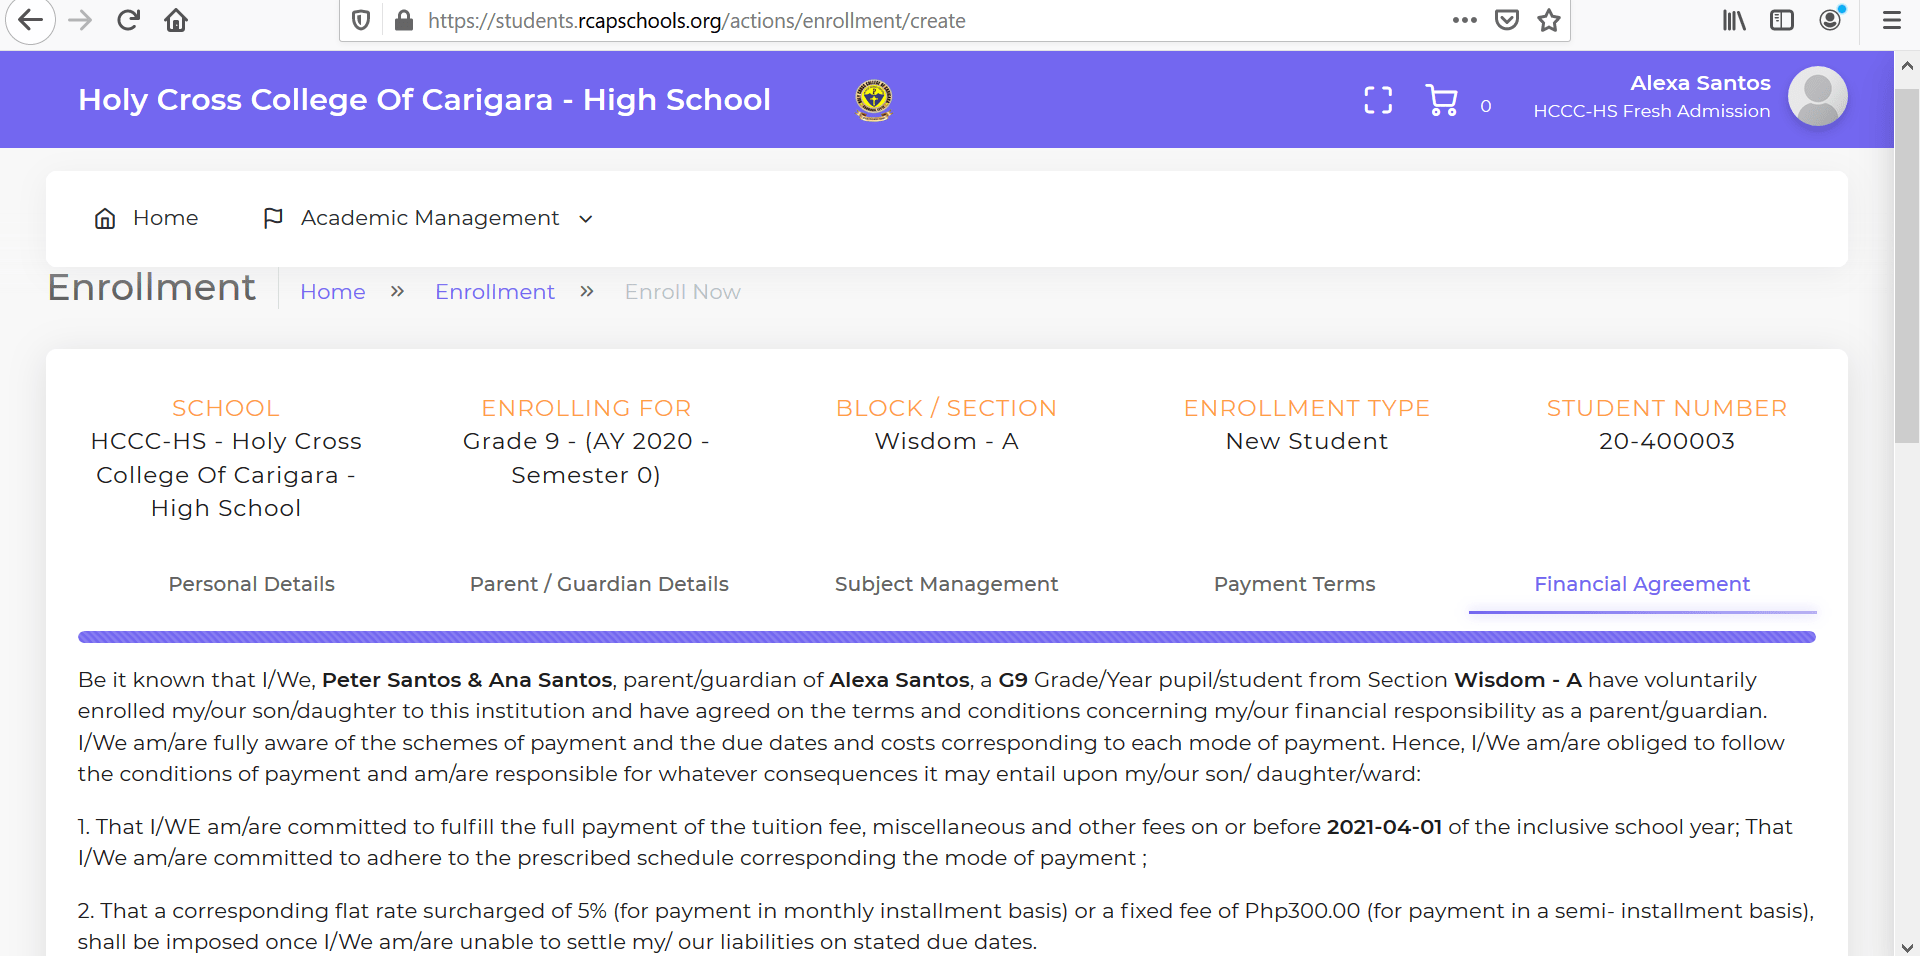
You will be directed to the Financial Agreement page where you can view the terms of your financial agreement. Read the terms carefully and signify your agreement to the terms by checking the box corresponding to “I confirm that I have read, understand and agree to the above terms of agreement for enrollment in the [name of school]”. Click “Apply Now” to move to the next page.
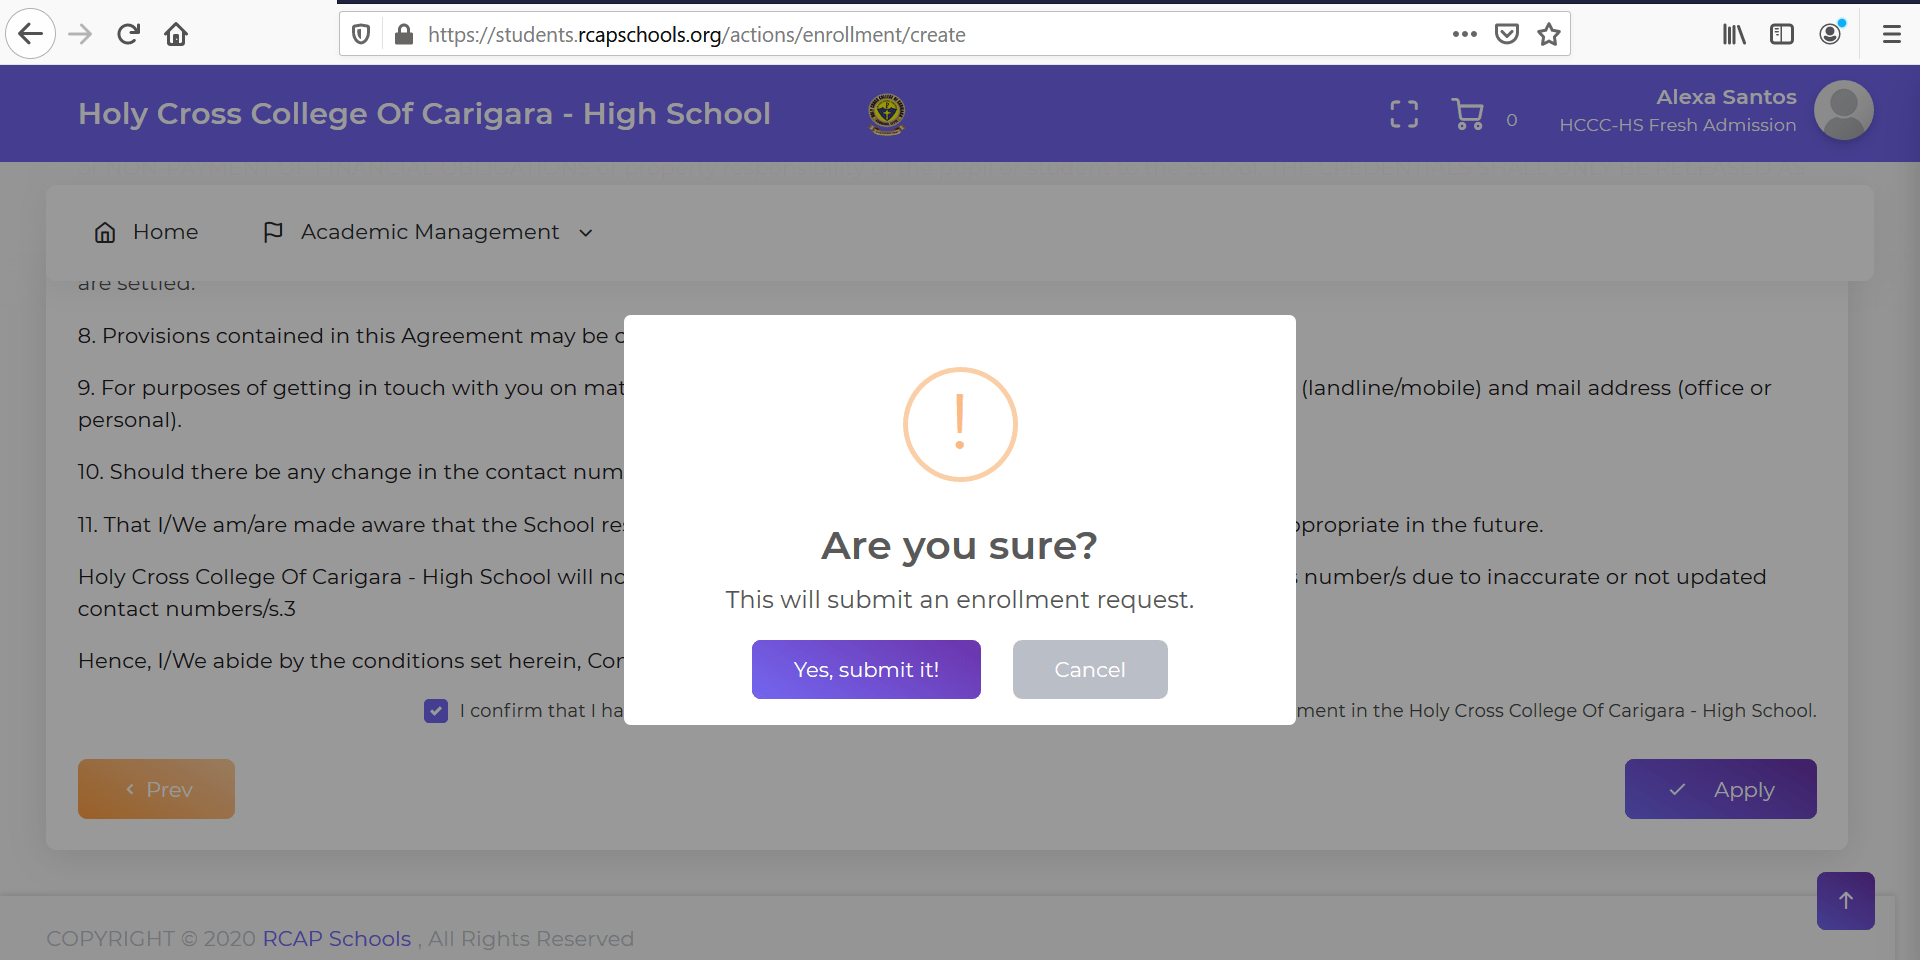
Upon clicking “Apply Now”, a pop-up message “Are you sure?” will appear. Click “Yes, submit it!”
If, after clicking “Yes, submit it!”, you see a pop-up “Warning!” message stating that you need to fix input warnings, you need to check for required detail fields that are incomplete. These incomplete fields would be highlighted in red, as in the sample screenshot below.
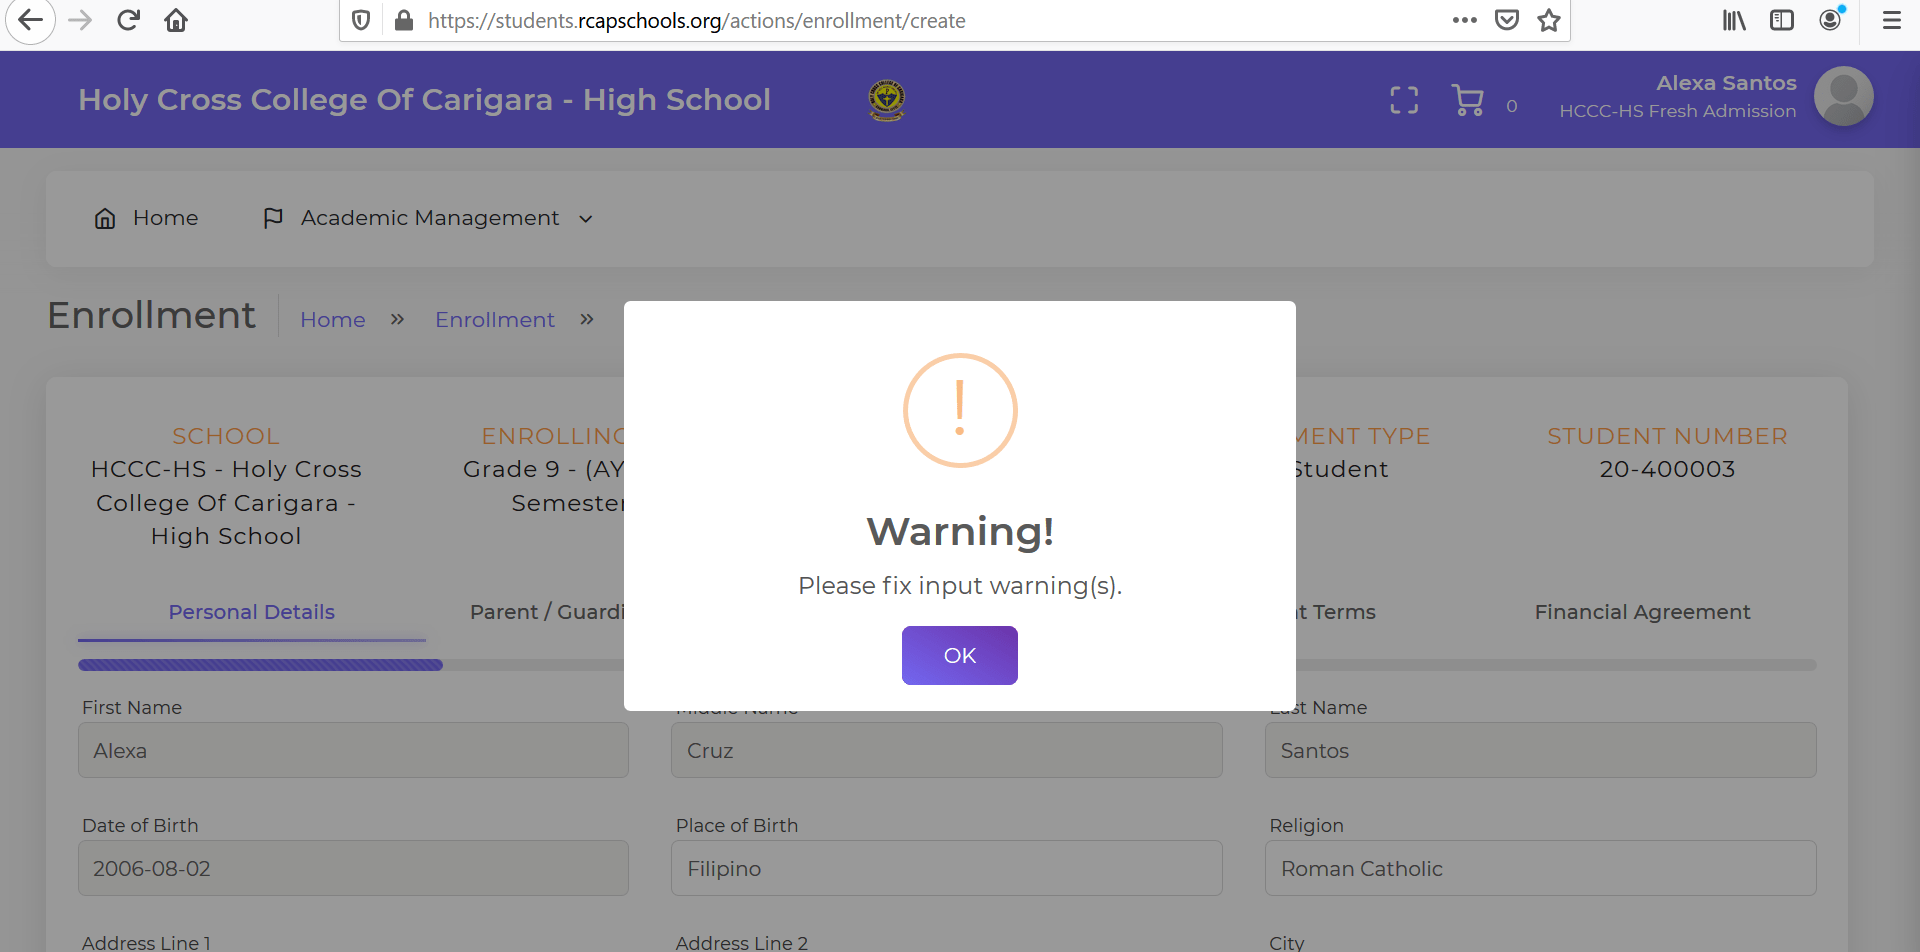

After completing the required fields, click “Next”.
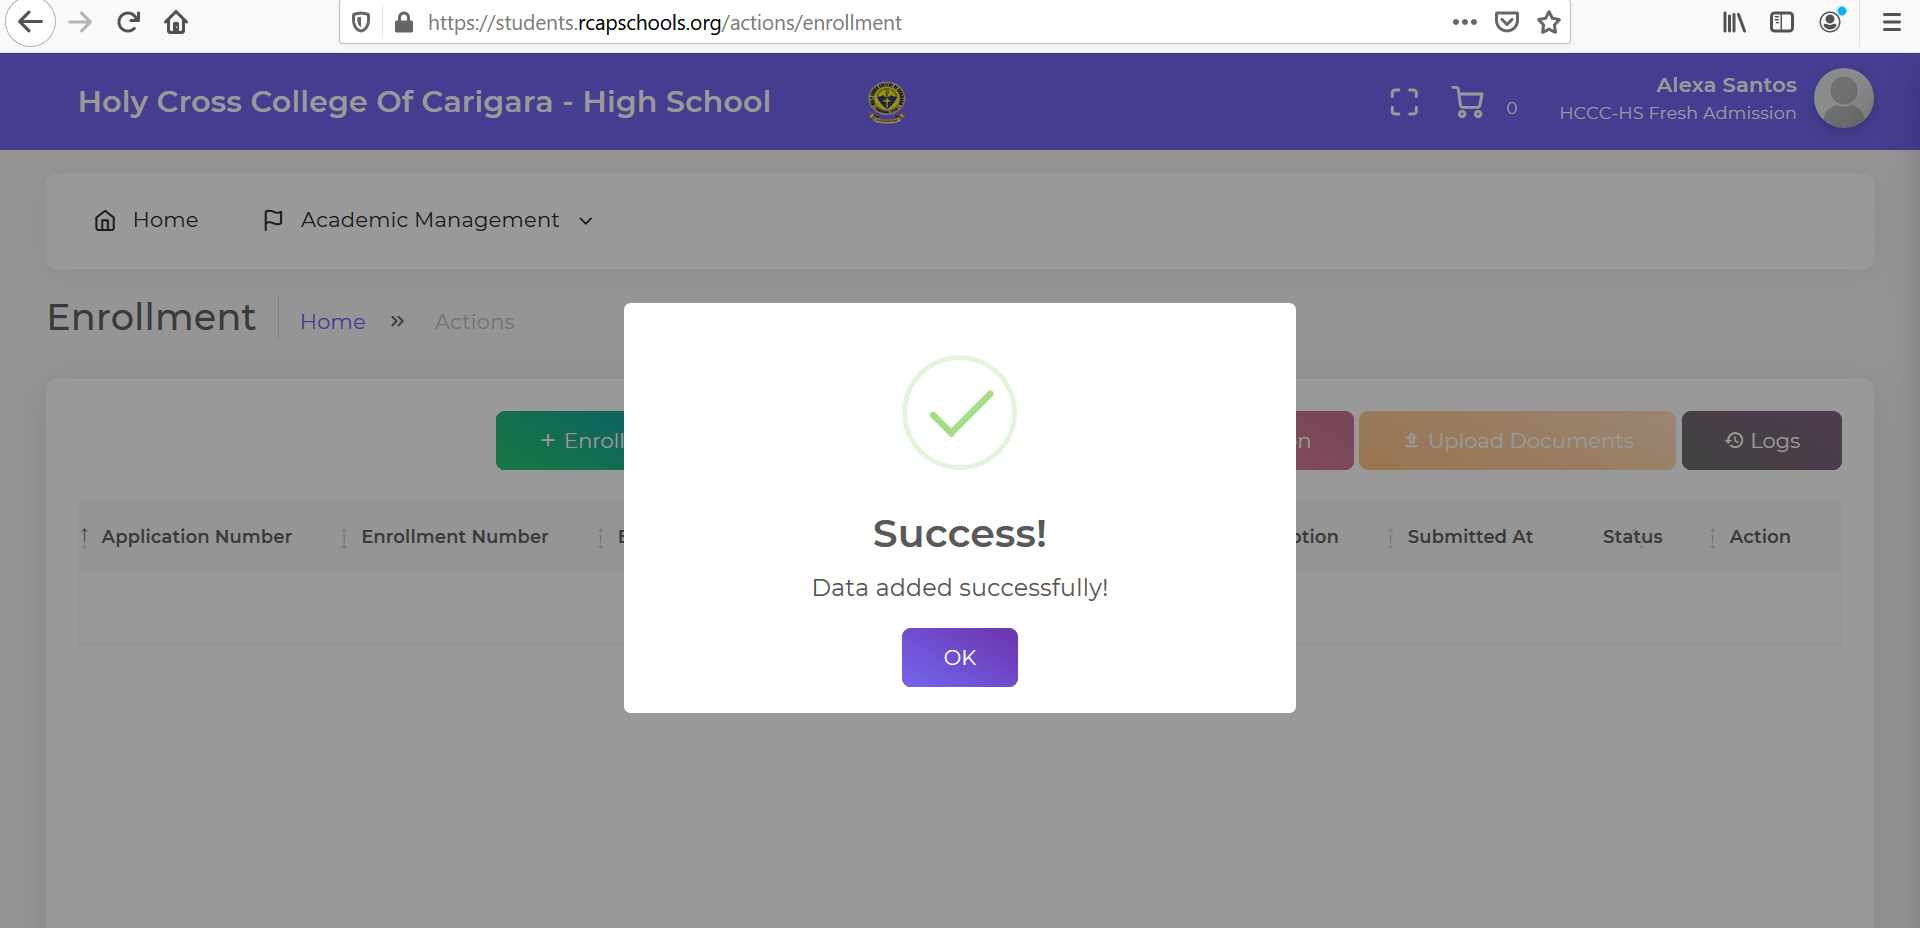
Once the required fields are fixed, OR if there are no incomplete data fields in the Enrollment Form, a pop-up “Success!” message will appear. Click “OK”.
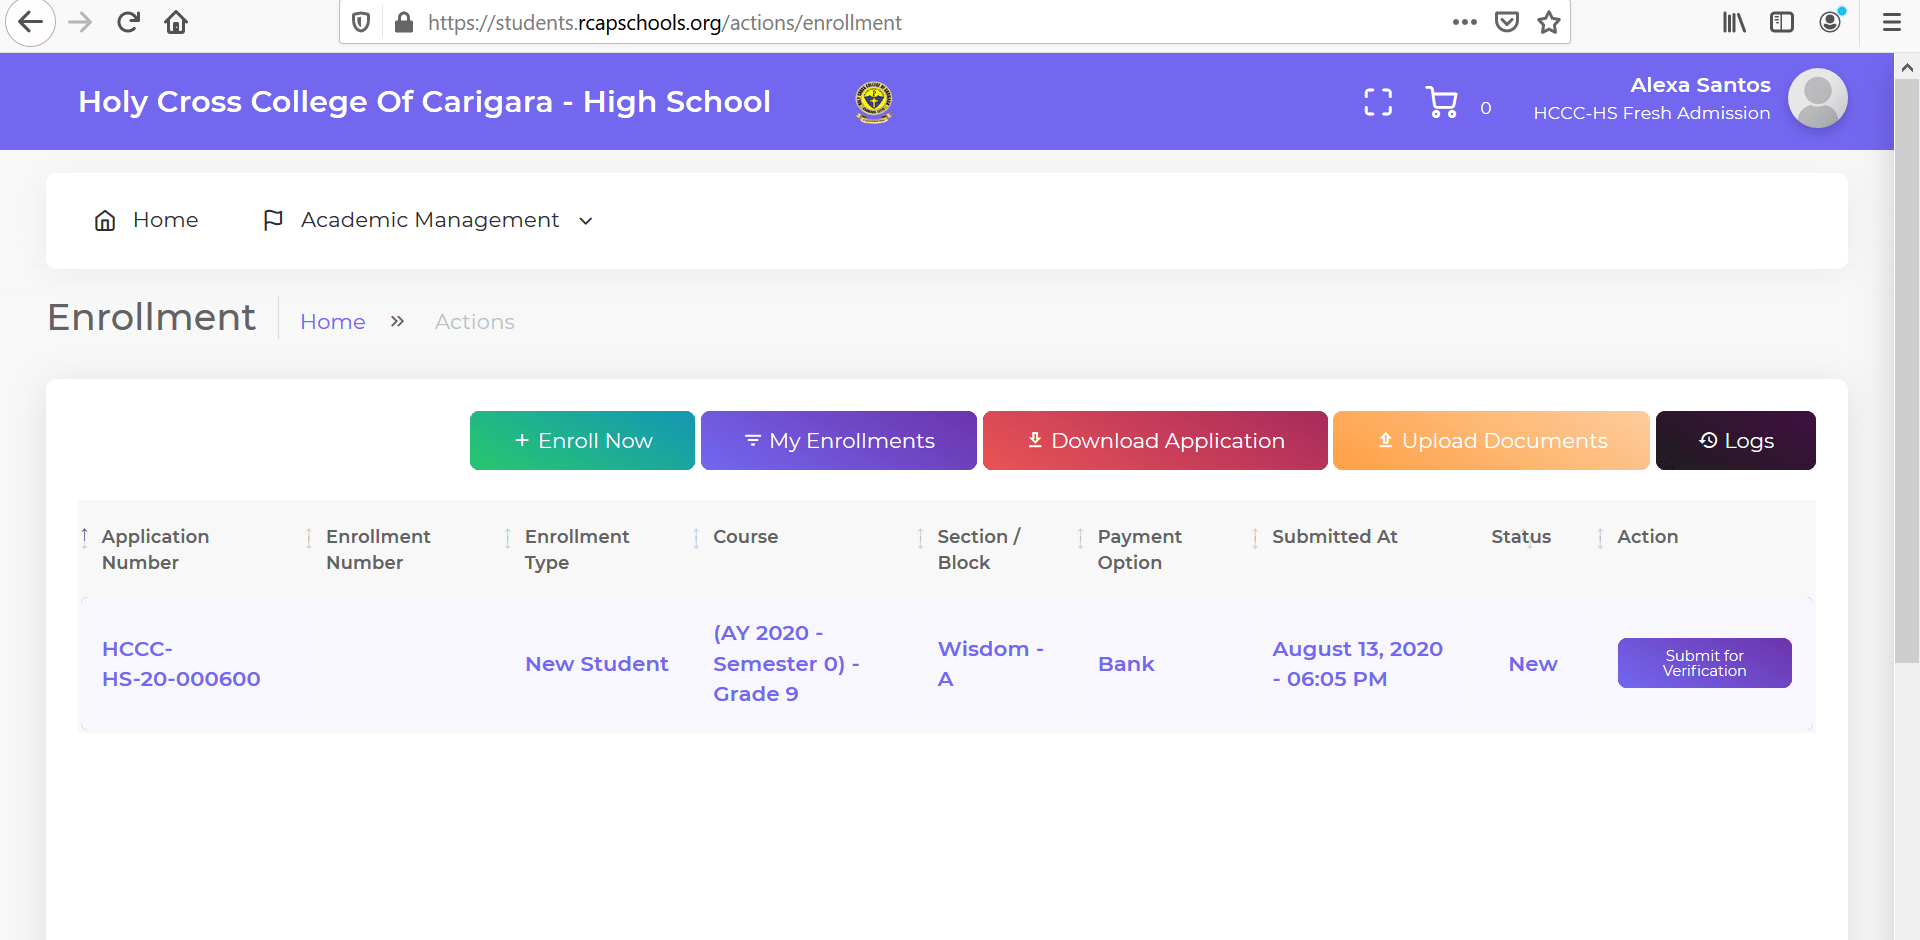
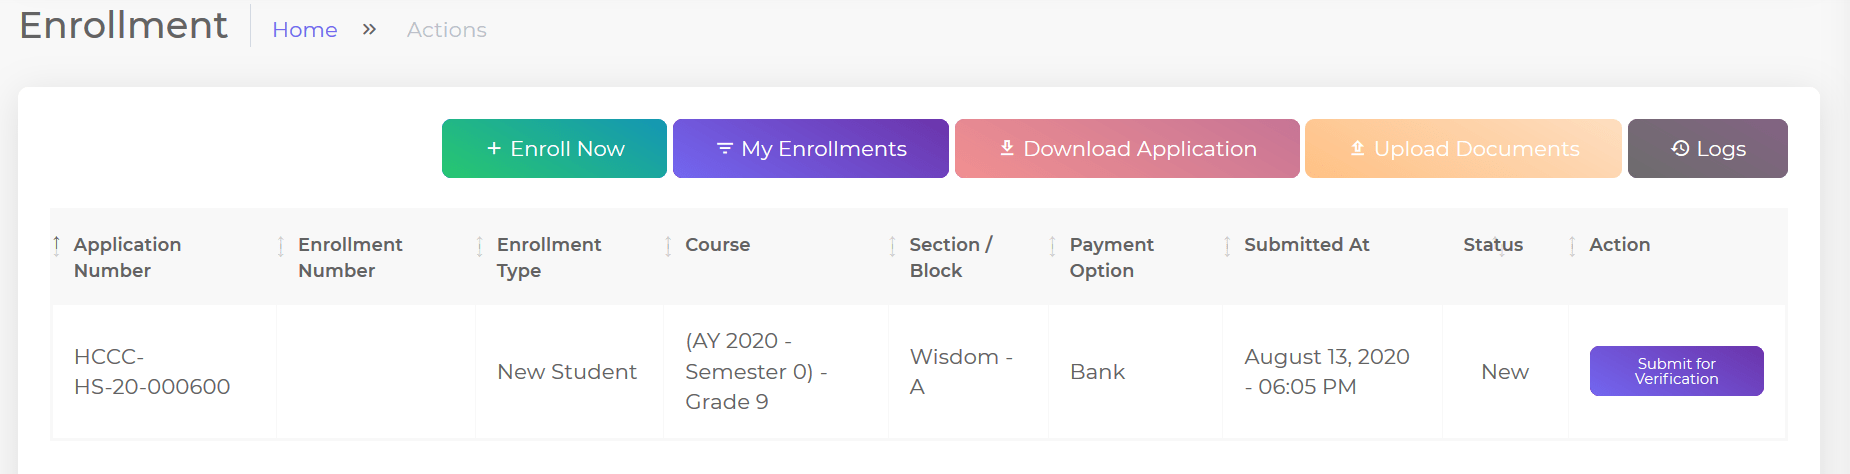
After successfully completing the incomplete fields, OR, if there are no required fields to be fixed after clicking “Yes, submit it!”, you will be directed to the Enrollment homepage again. Click My Enrollments to view a summary of your submitted enrollment details.
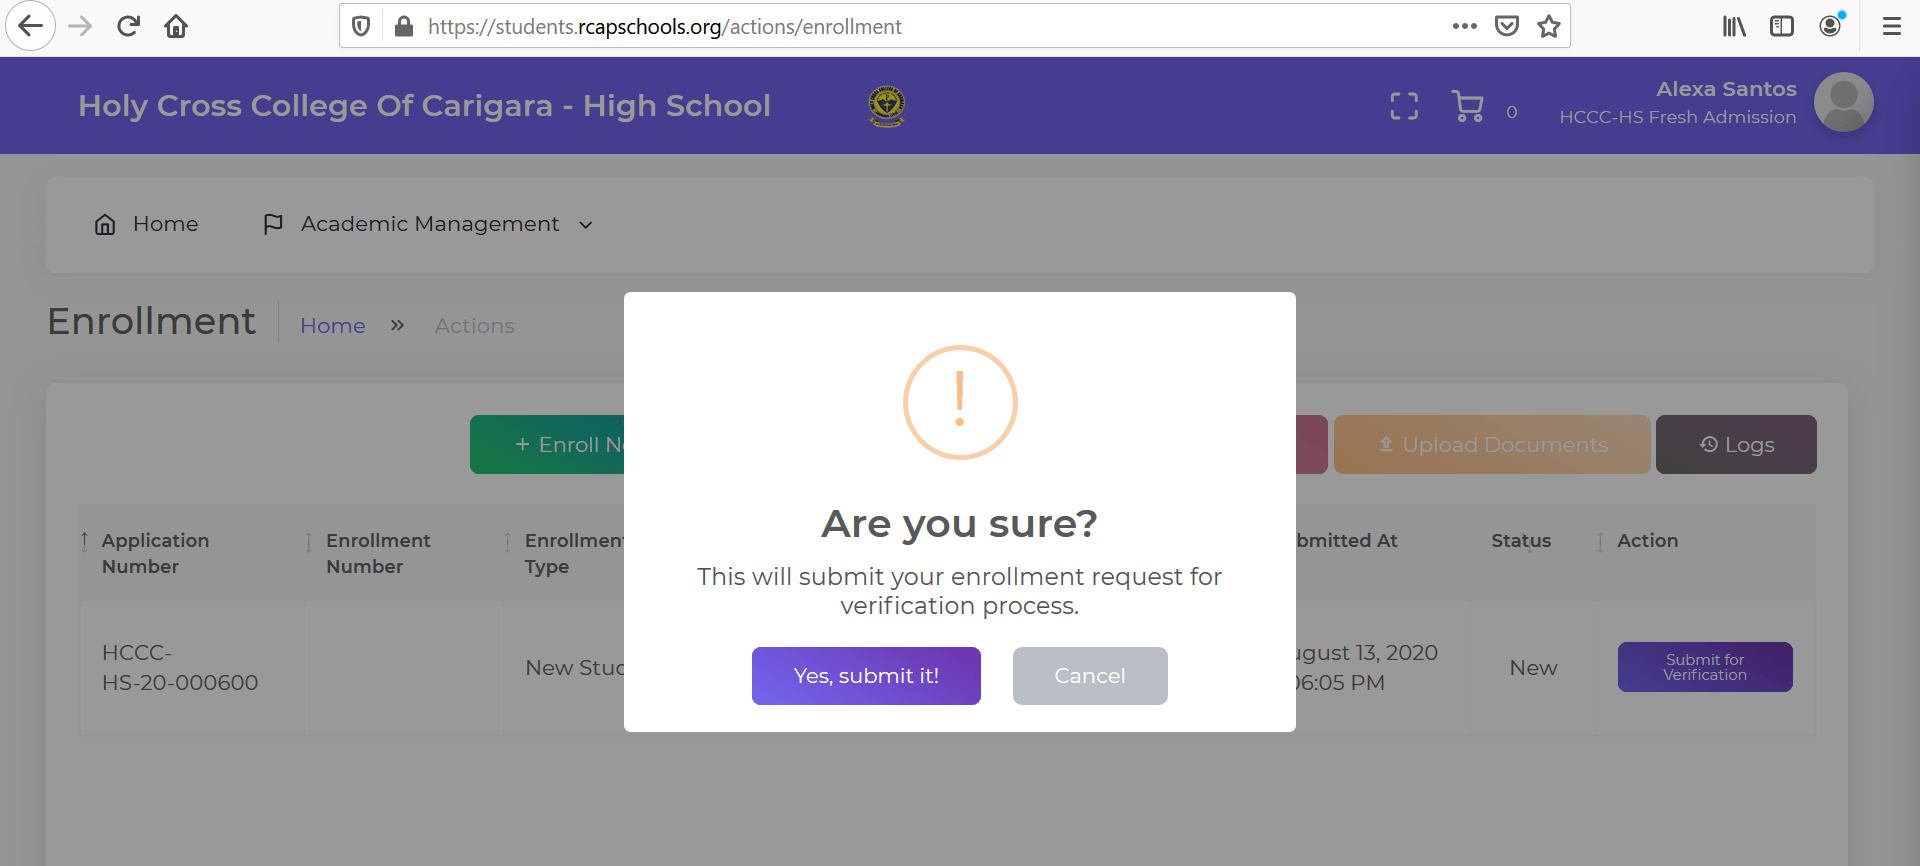
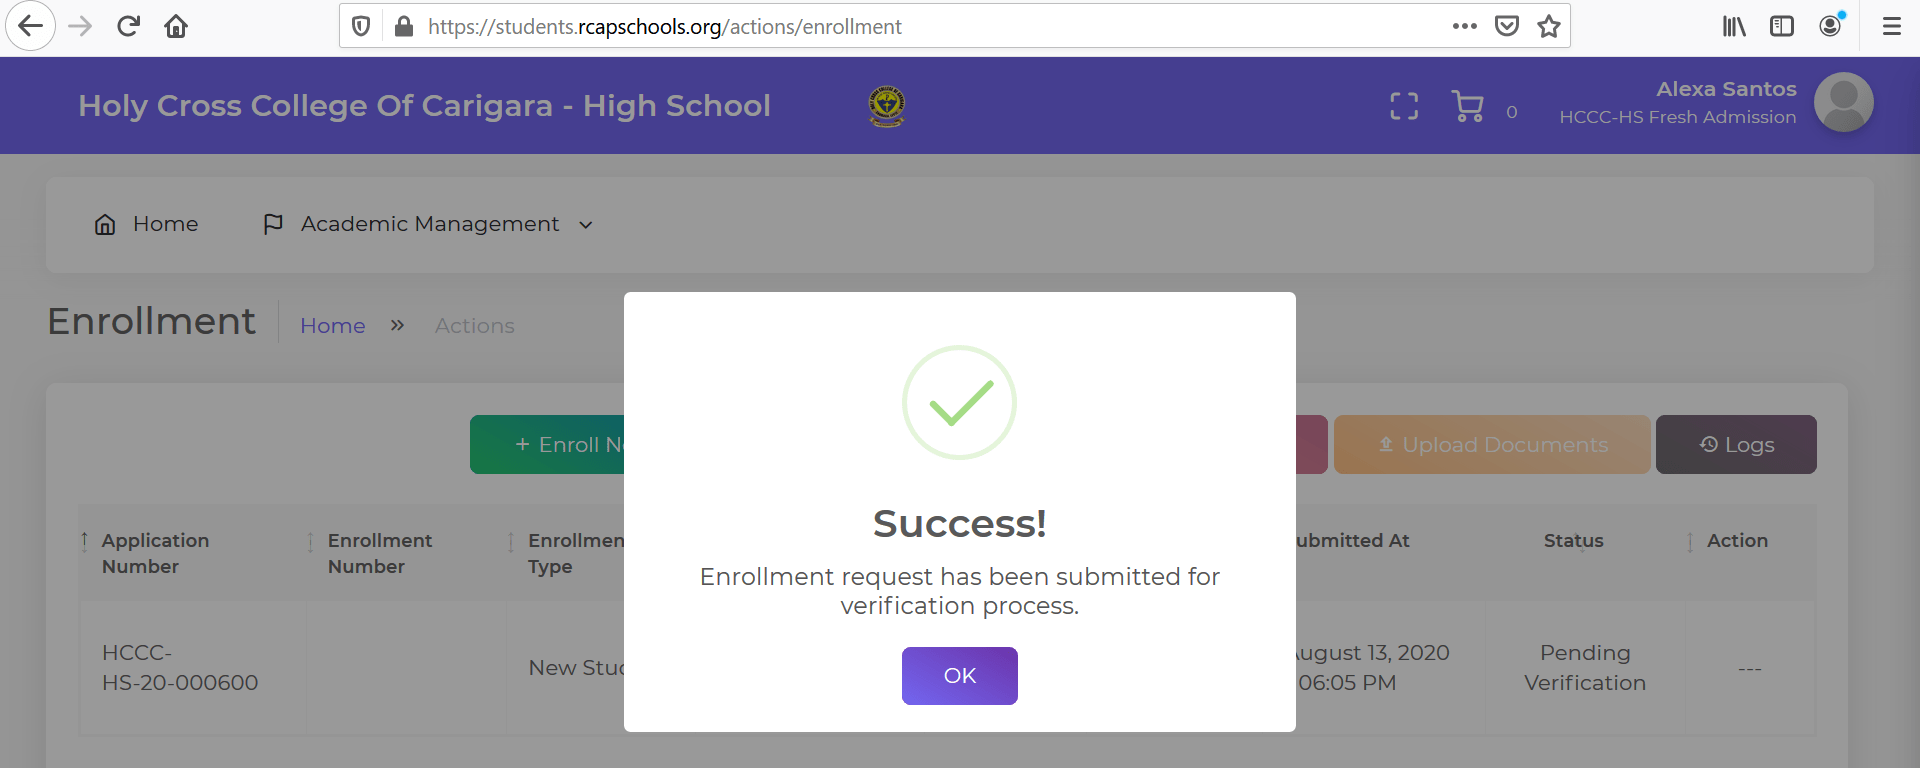
After clicking “My Enrollments”, you will be directed to this page where you can view your enrollment summary. Click Submit for Verification.

A pop-up “Are you sure?” message will appear. Click “Yes, submit it!”

If there are documents required to be uploaded, and you have not uploaded these documents, a pop-up message will appear alerting you about any document you must upload. These required documents may either be one or both of: (1) a signed copy of the completed enrollment form, and (2) bank deposit slip as proof of payment of fees.
Click “OK”.

After clicking “OK”, you will be directed to this page again. Click Upload Documents.
After clicking “Upload Documents”, you will be directed to the Payment Terms page again, where you will see additional instructions for uploading the required documents. See sample image below.

For example, if the system alerted you to “upload the Enrollment Form or accept the Electronic Acceptance”, and/or to “upload the Bank Payment Slip” if you selected “Bank Deposit” as your preferred mode of payment, you will see instructions for uploading a signed copy of the enrollment form and a copy of the bank deposit slip (as proof of payment) in the corresponding upload boxes. Follow the instructions to upload the required documents.
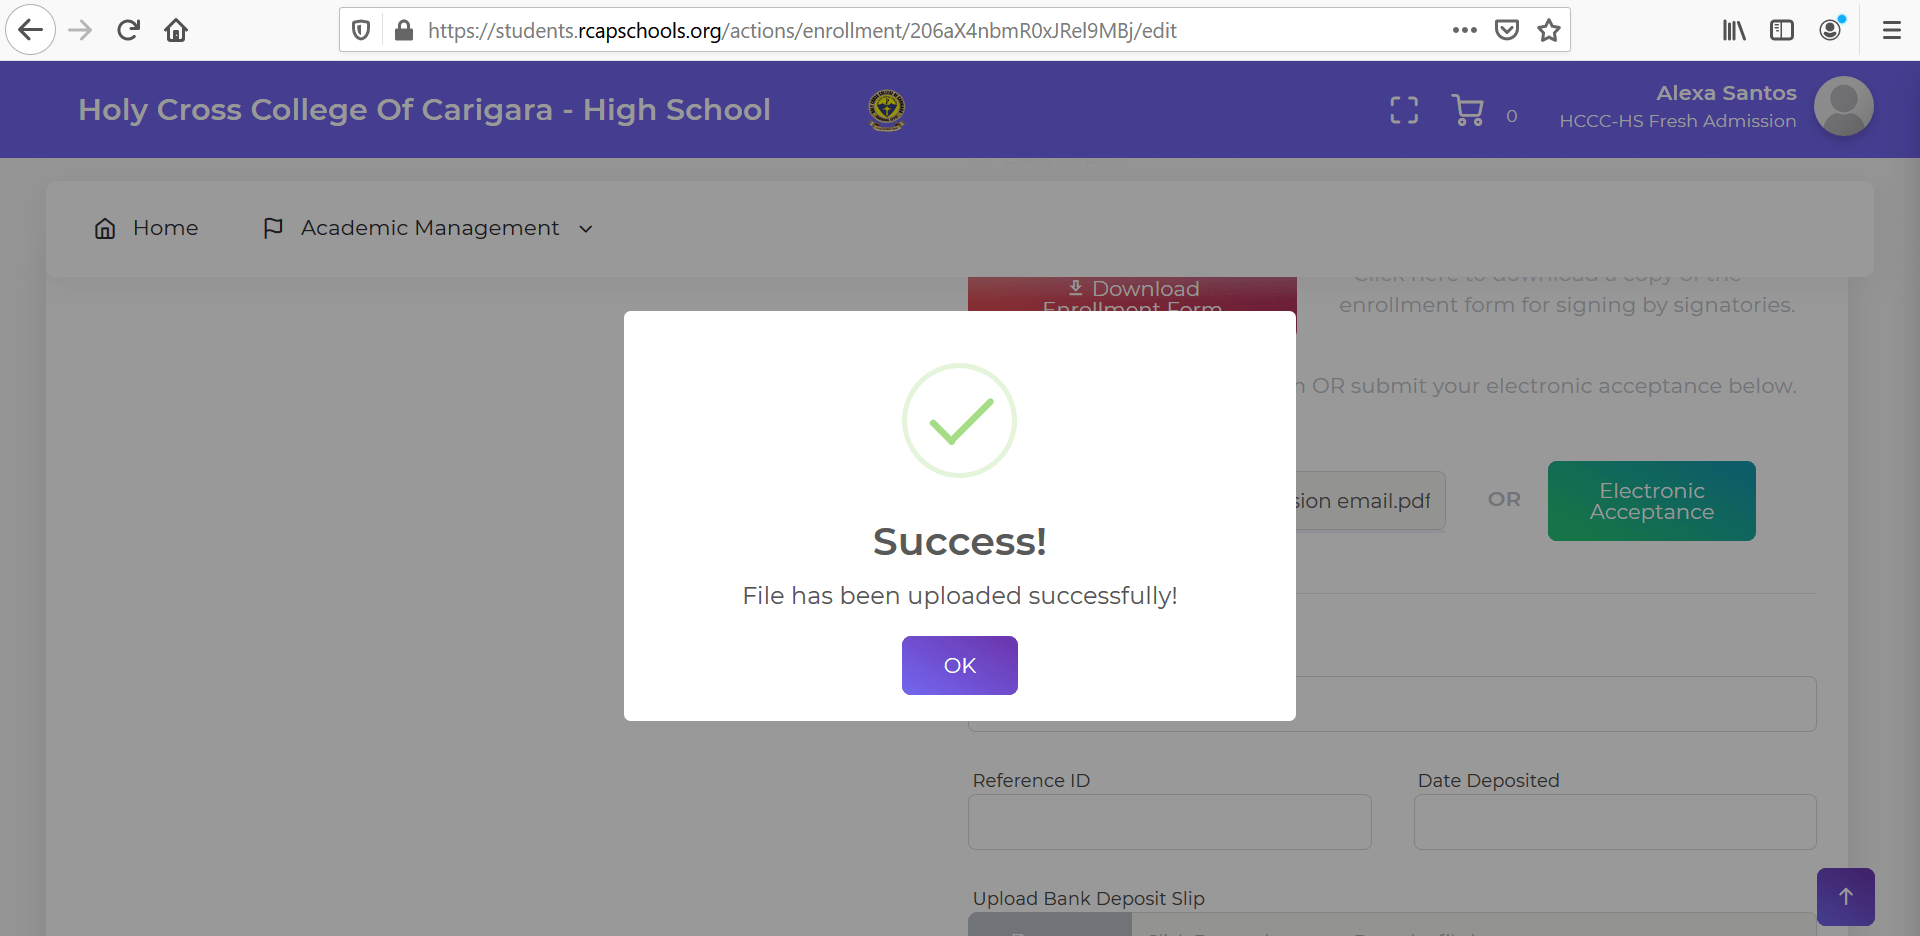
You can click Download Enrollment Form to download the enrollment form. Print it, and sign on all the spaces allotted for signature. Scan the signed copy and upload in the corresponding upload box. Upon uploading the document, a pop-up “Success!” message will immediately appear.
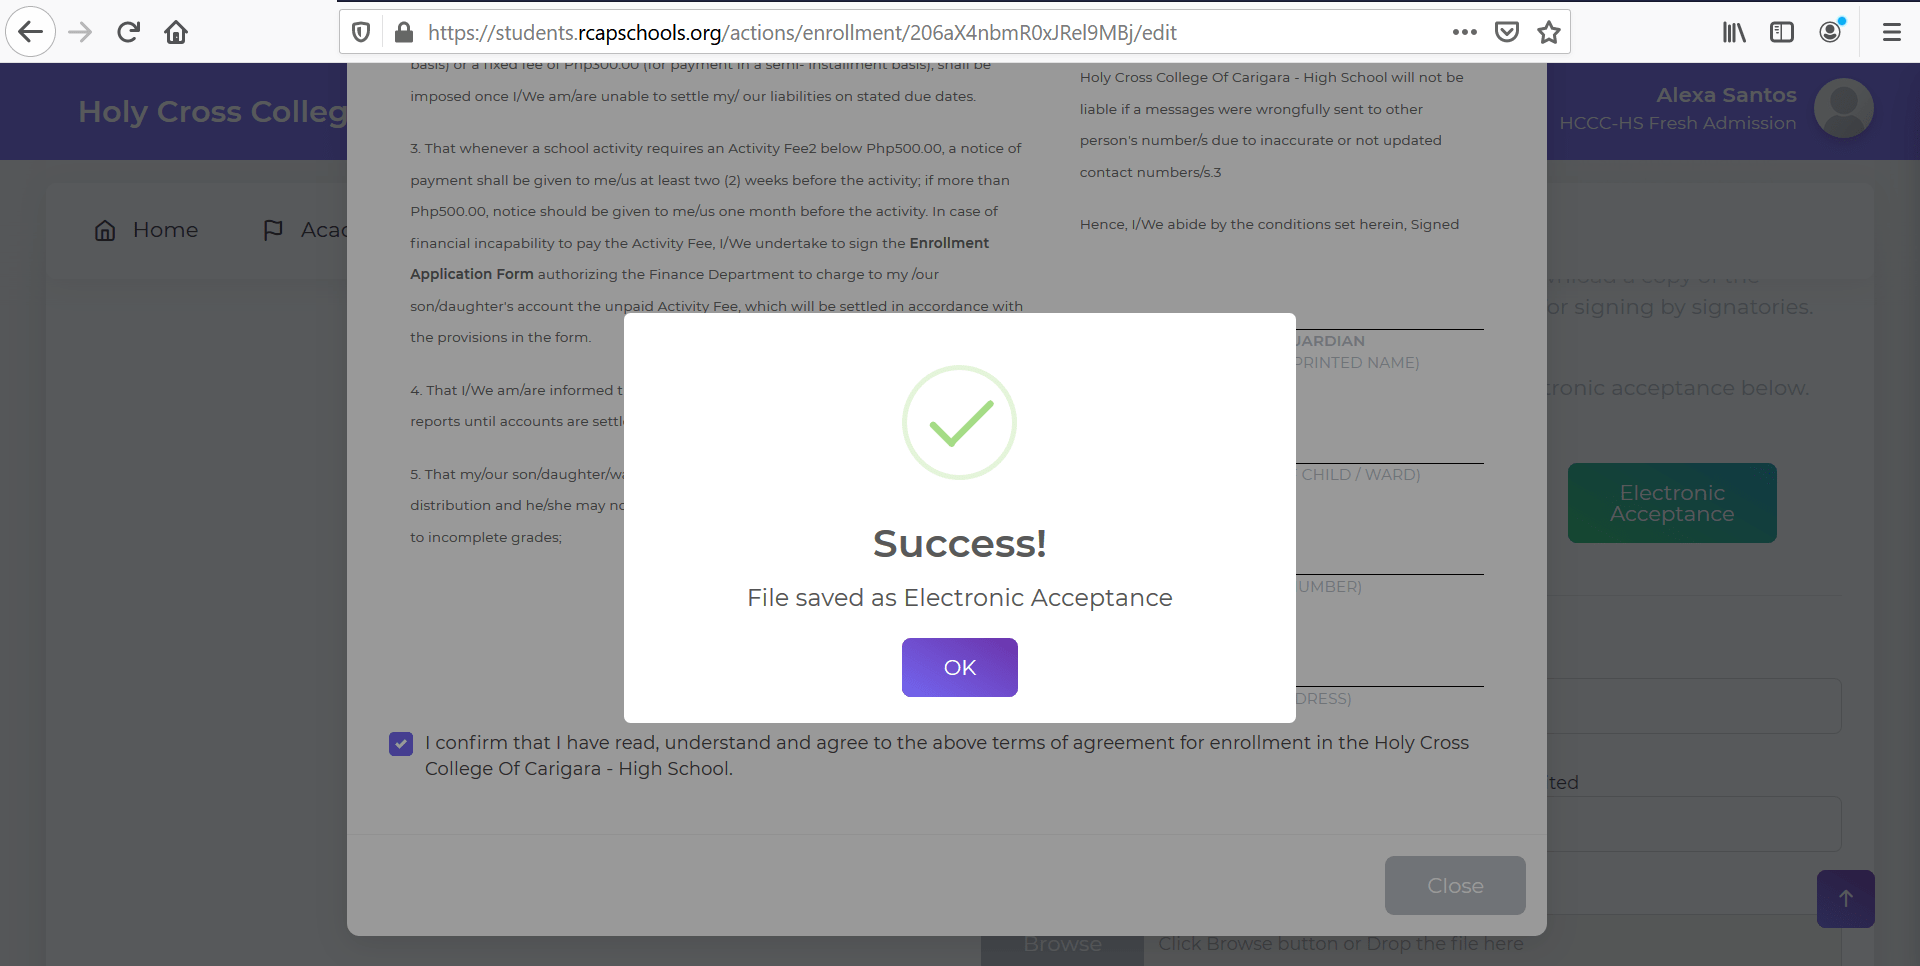
ALTERNATIVELY, you can skip the download-print-sign-scan-upload method for now, and just click Electronic Acceptance. Upon clicking the Electronic Acceptance button, a pop-up “Success!” message will immediately appear.
If you selected Bank Deposit as your mode of payment, you need to upload a copy of your Bank Deposit Slip (as proof of your payment) in the corresponding upload box. Upon uploading the document, a pop-up “Success!” message will immediately appear.
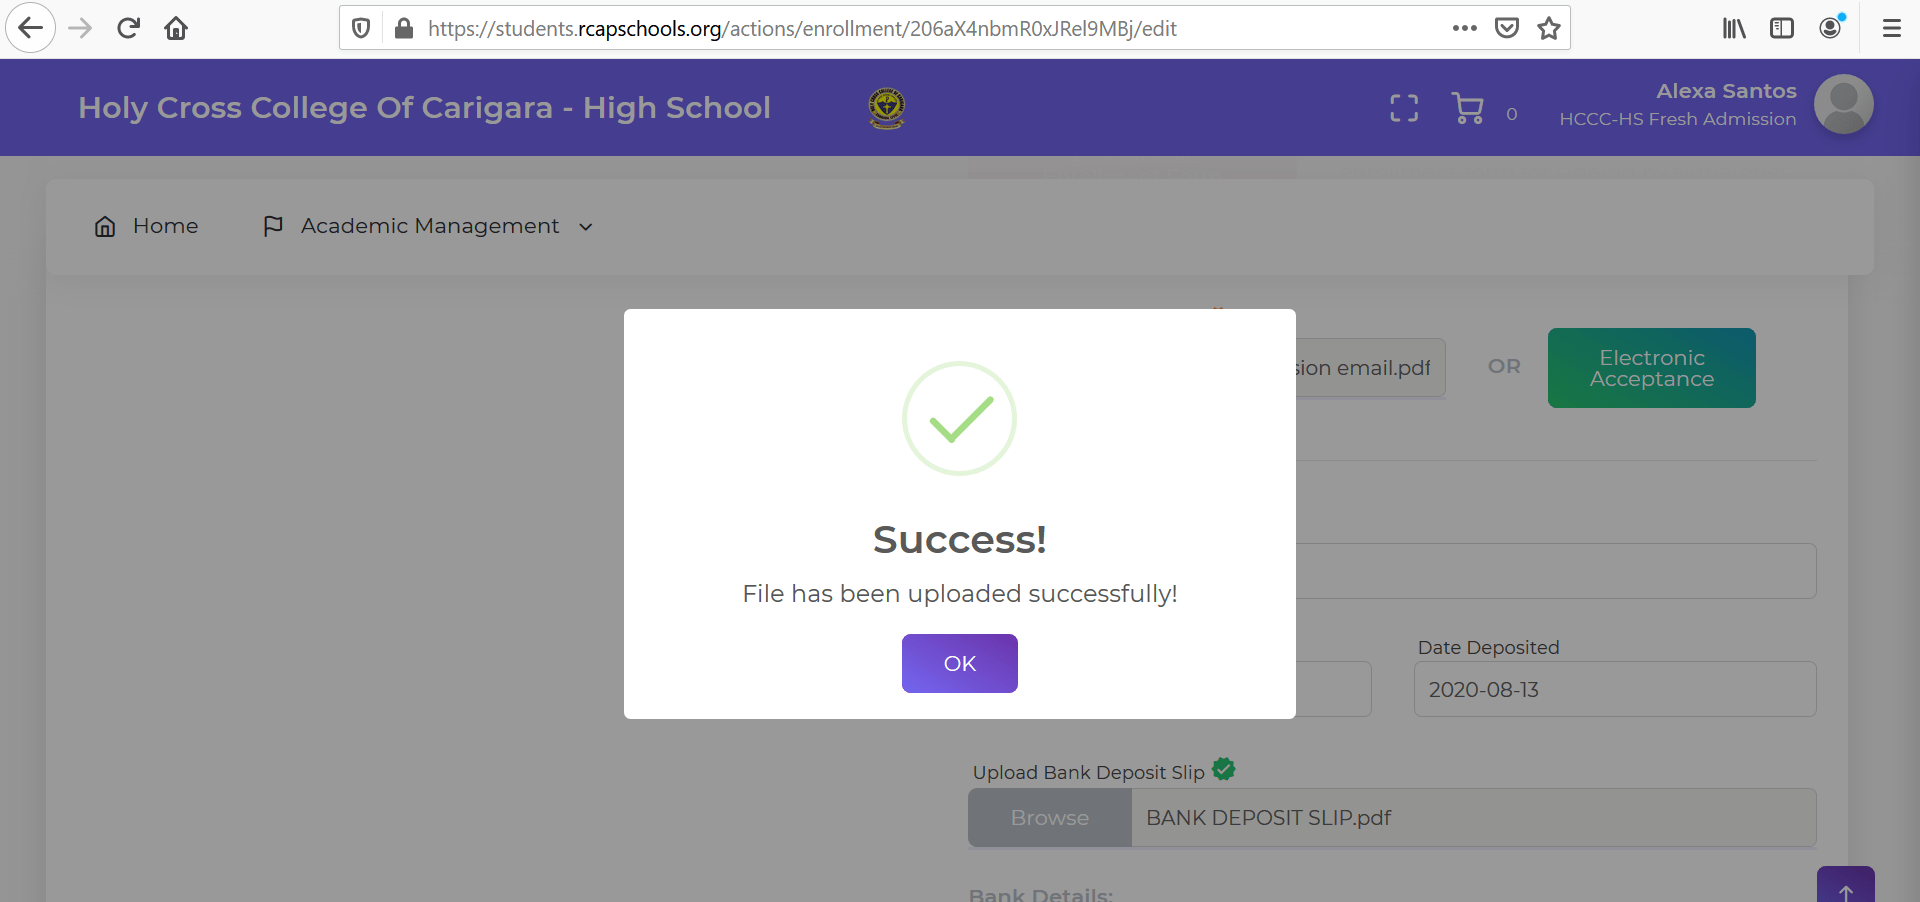
Note that this icon ![]() denotes that your Bank Deposit Slip was successfully uploaded.
denotes that your Bank Deposit Slip was successfully uploaded.
Click “Next”. You will be directed to the Files Uploaded page where you can view all the documents you have uploaded.

Click “Go Back”. You will be directed to the Enrollment homepage.
Once you have completed uploading all required documents and after clicking “Go Back”, you will be directed to the Enrollment homepage. Click My Enrollments.

Upon clicking “My Enrollments”, you will see in grey color font a summary of your enrollment details. Click anywhere on that summary line to highlight it for next action.
The same summary line will turn purple to indicate that it has been highlighted for next action. This will allow you to click any of these buttons: Download Application, Upload Documents, Submit for Verification.
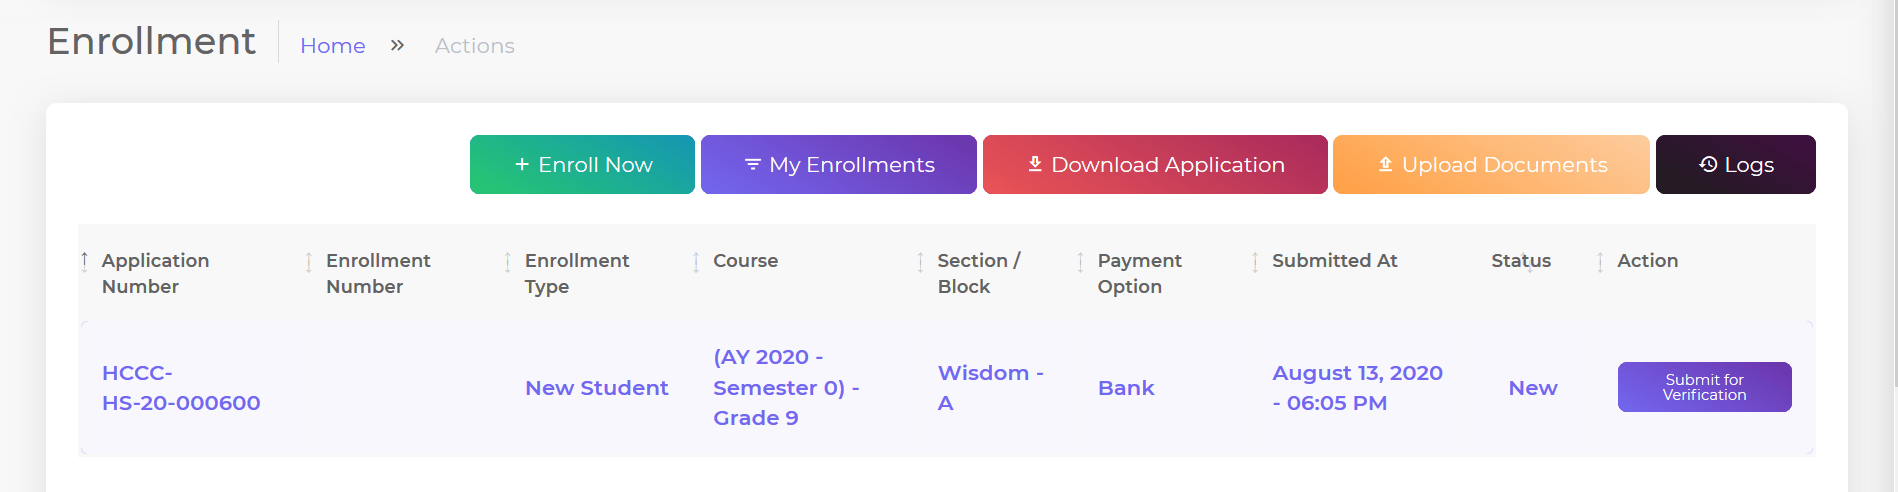
At this point you can still download a copy of your completed enrollment form, or upload any required document. You can also finally submit your enrollment request for verification by the school. To finally submit your enrollment form for verification by the school, click Submit for Verification.
A pop-up “Are you sure?” message will appear. Click “Yes, submit it!”
After clicking “Yes, submit it!” a pop-up “Success!” message will appear. The status of your enrollment will also be updated from “New” to “Pending Verification”.
At this point, your enrollment request is now finally submitted to RCAP Schools for verification and processing.
After verification and approval of your enrollment, you will receive an email notification confirming same.