Guidelines for using the RCAP Schools online admissions portal
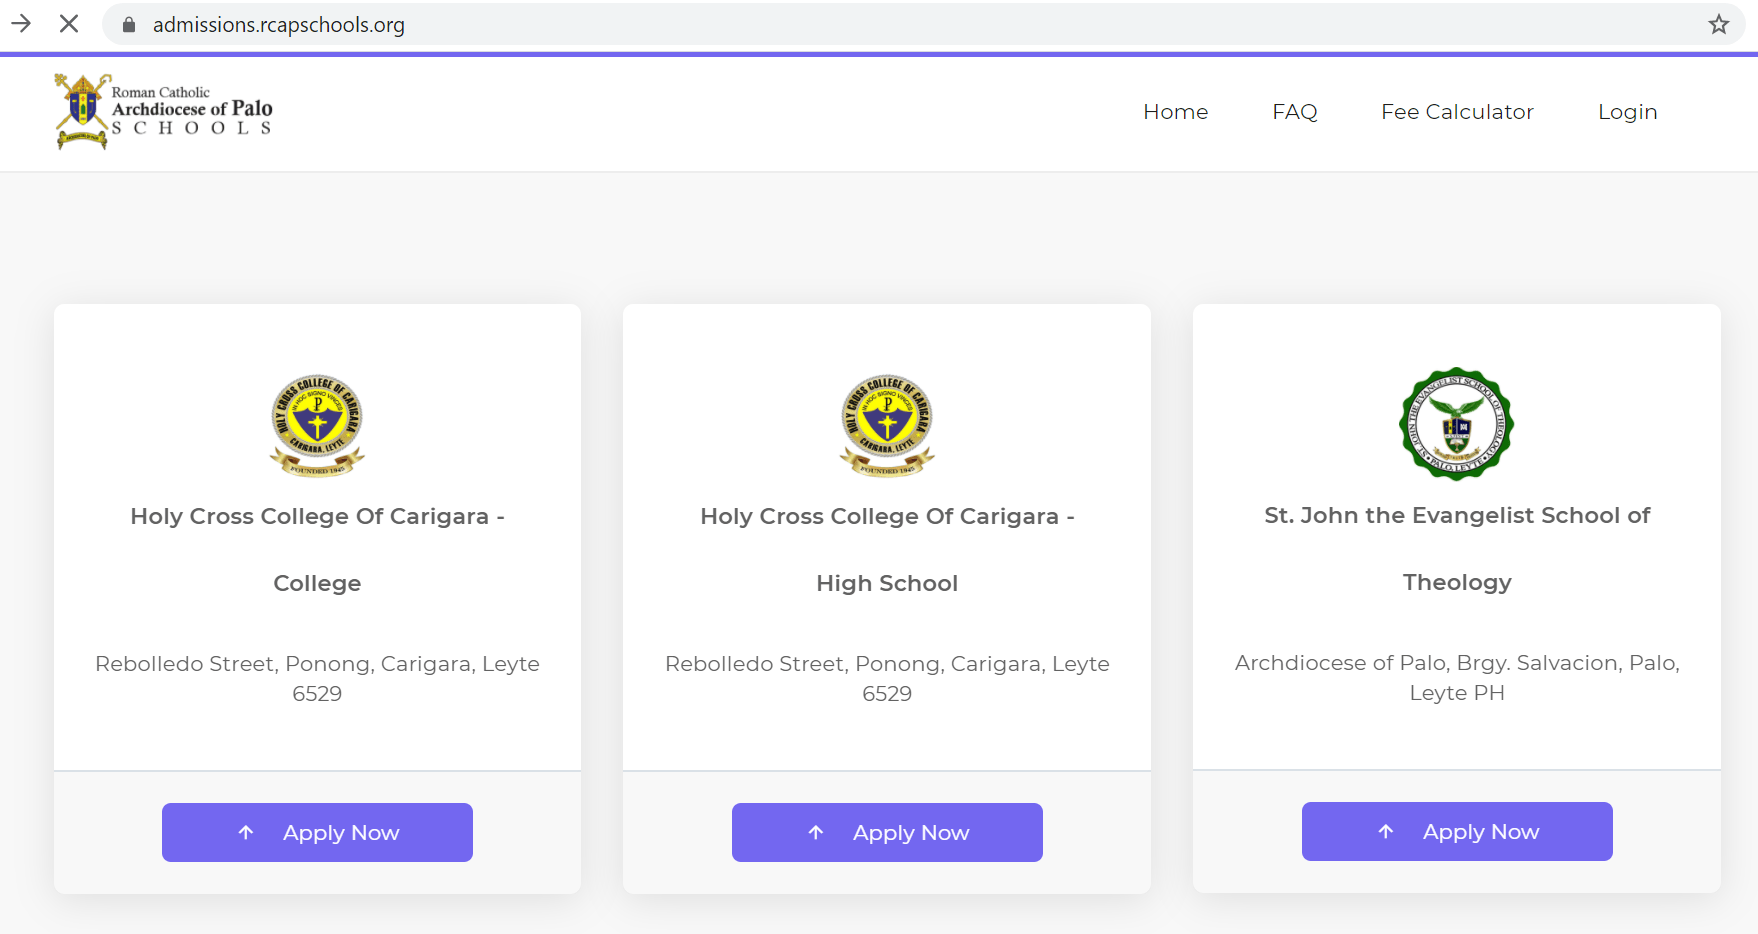
In the homepage, scroll down to see the RCAP schools presented, select your choice of school, and click “Apply Now”.
Special Note: Please note that the Admission Portal is for new applicants only (i.e. those applying for admission into the selected school for the first time).
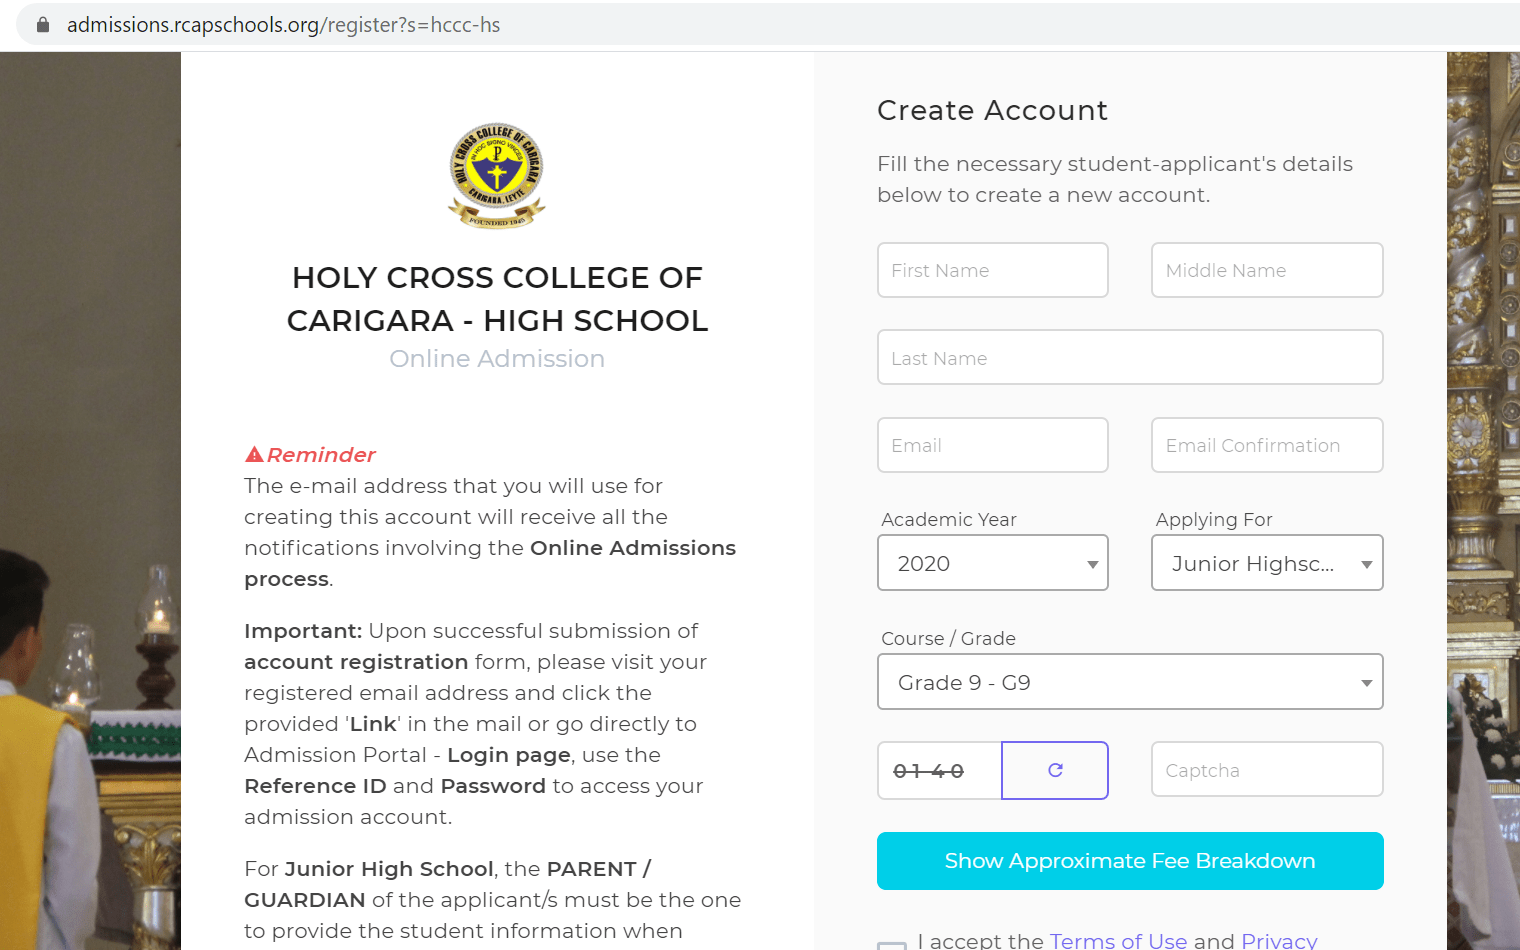
You will be directed to a “Create Account” page. Even without creating an account, you can view the approximate fees due corresponding to the particular course or grade level in your school of choice. Simply fill in the appropriate details required under “Academic Year”, “Applying For”, “Course/Grade” and click “Show Approximate Fee Breakdown”.
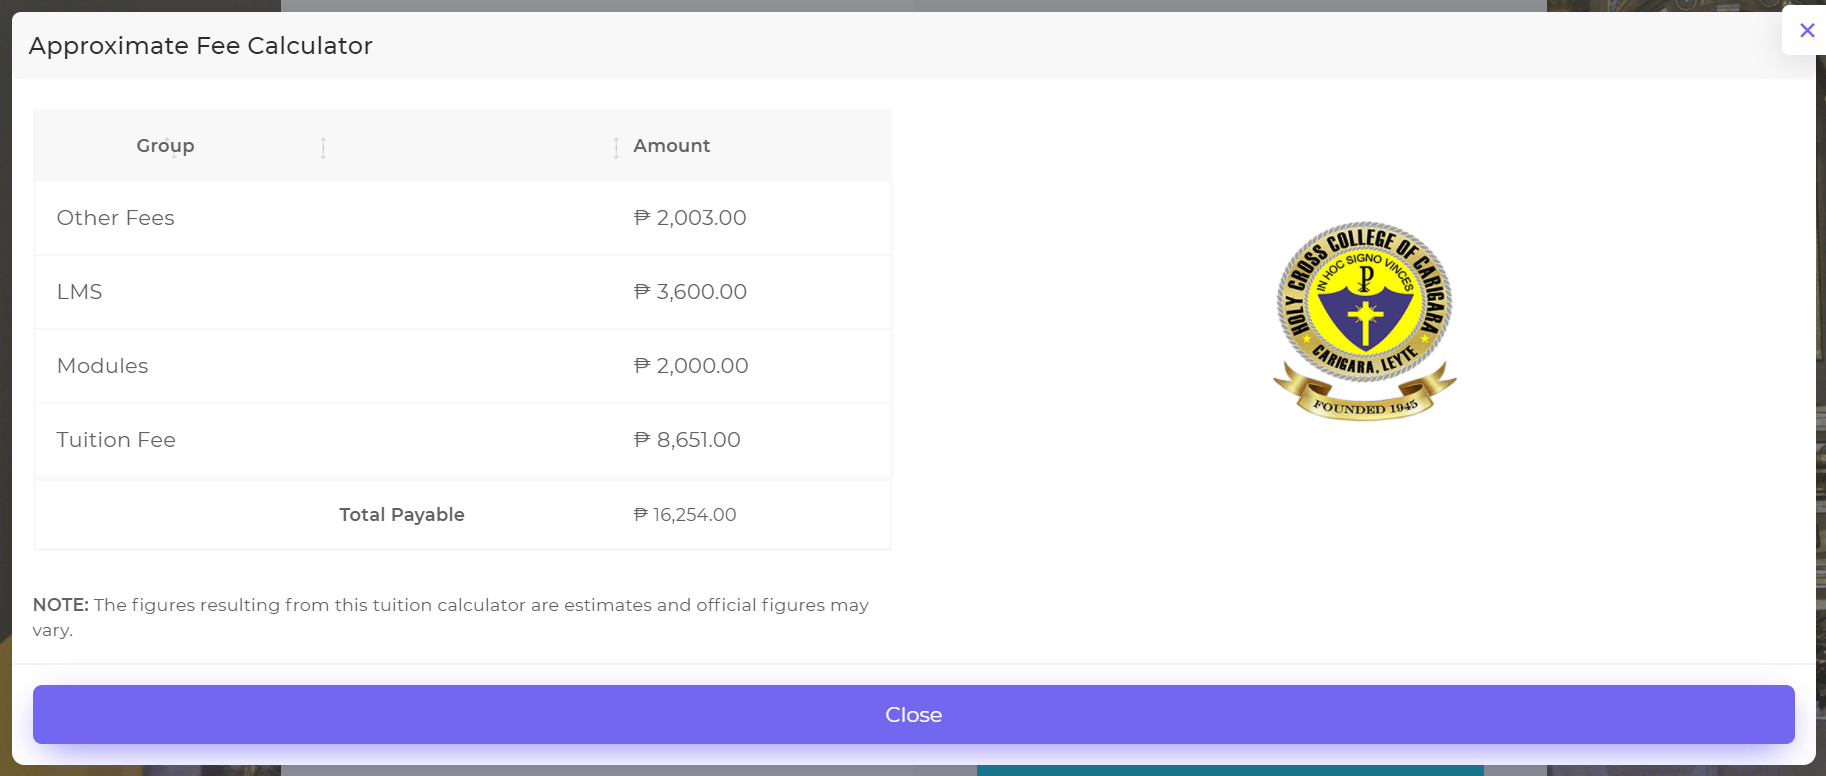
A pop-up window showing “Approximate Fee Calculator” will appear. Scroll down the menu of fee categories to see a breakdown of fees due for the course or grade level selected. Note that the figures resulting from the calculator are estimates and official figures may vary.
To close the calculator, click X at the upper right corner, or “Close” at the bottom of the window.
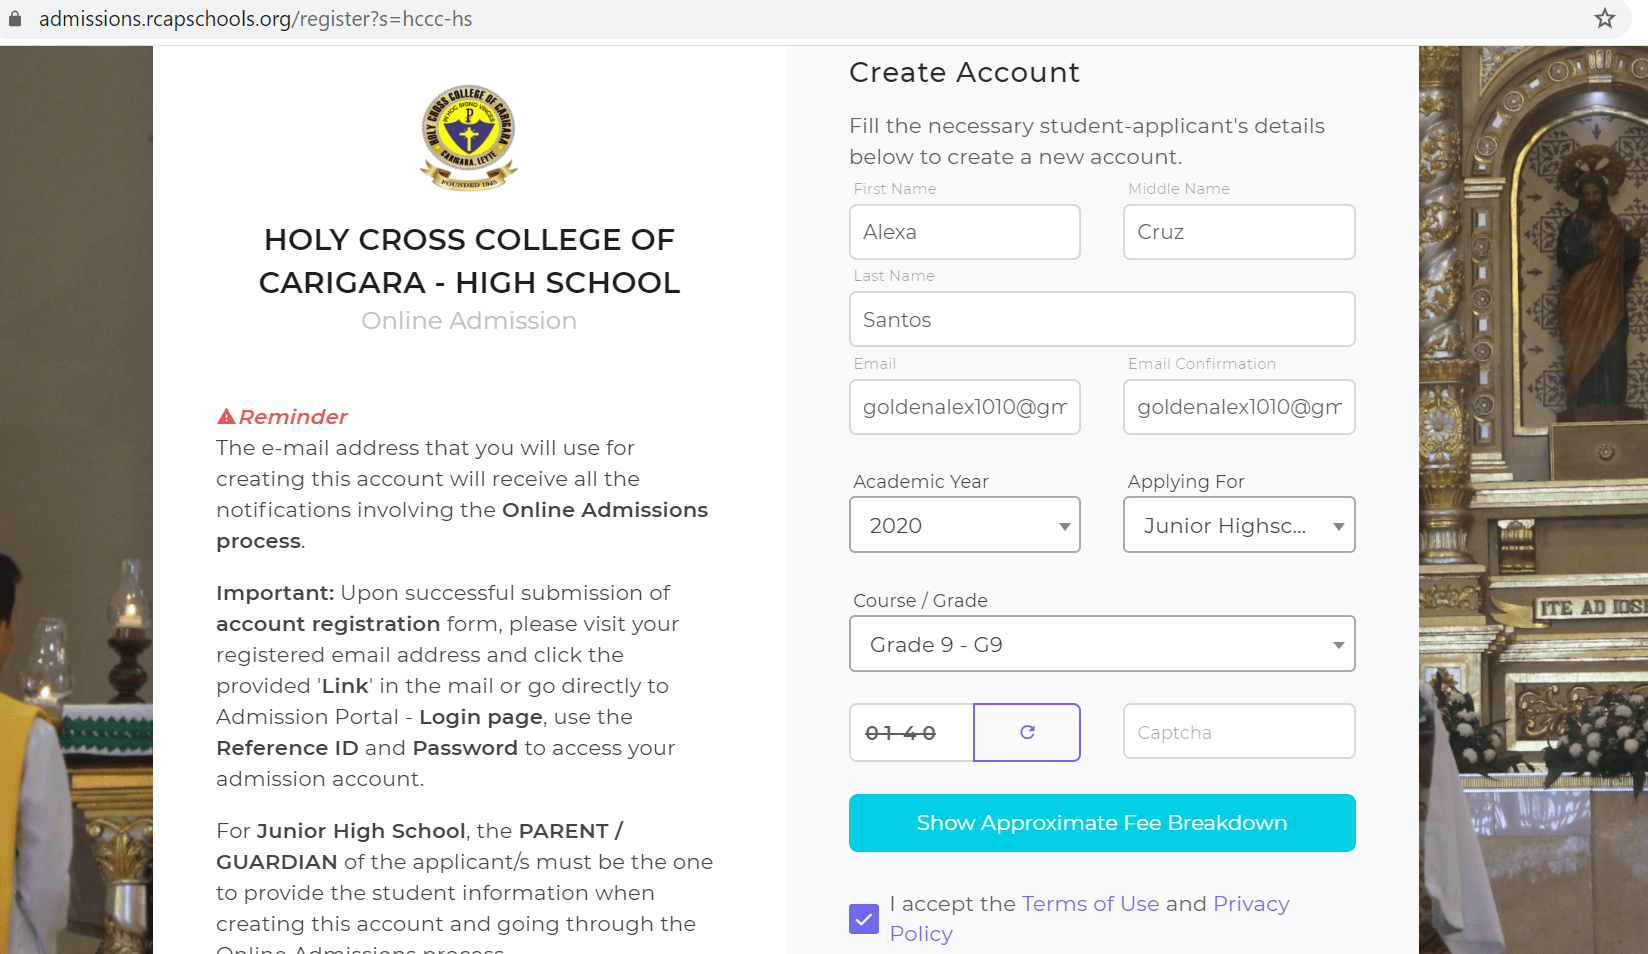
Upon closing the fee calculator, you will be directed back to the “Create Account” page. Please complete the details to create your account. Make sure you type in the correct Captcha code. Check the box corresponding to the clause “I accept the Terms of Use and Privacy Policy”. Click “Register”.
After successfully creating an account, you will see a confirmation like this.
Check your email for further instructions regarding your account. The email will look like the image below. If you do not receive an email, check your Spam folder and other email folders, as well as your email settings. If you still do not receive an email after a few hours, contact us at contact@rcapschools.org.
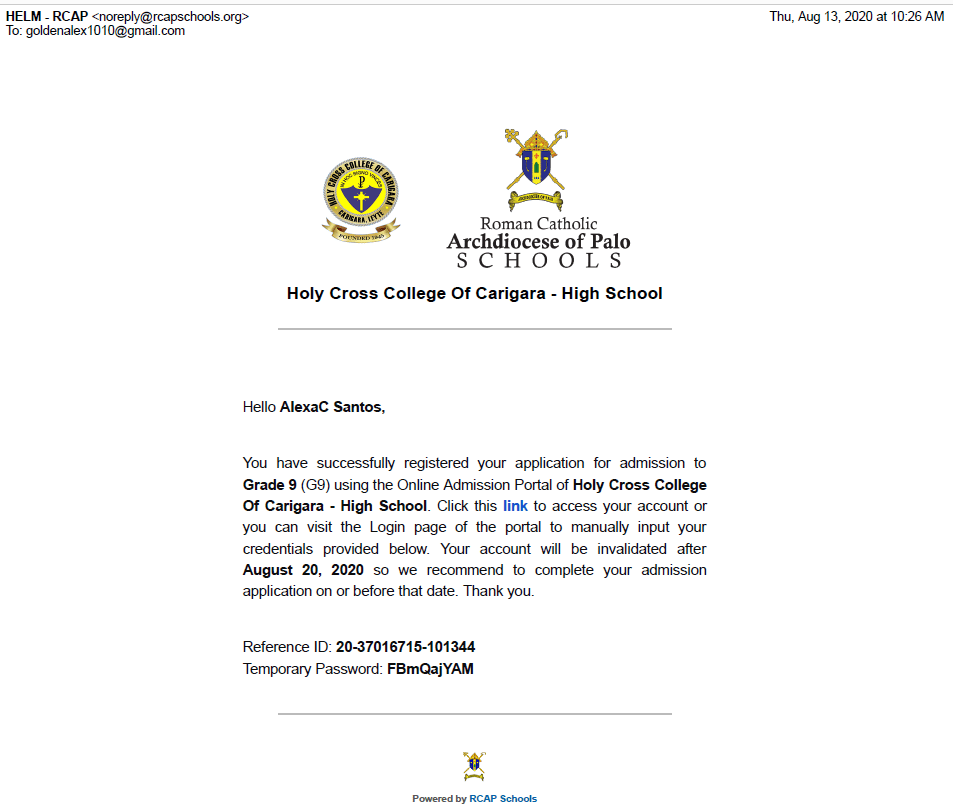
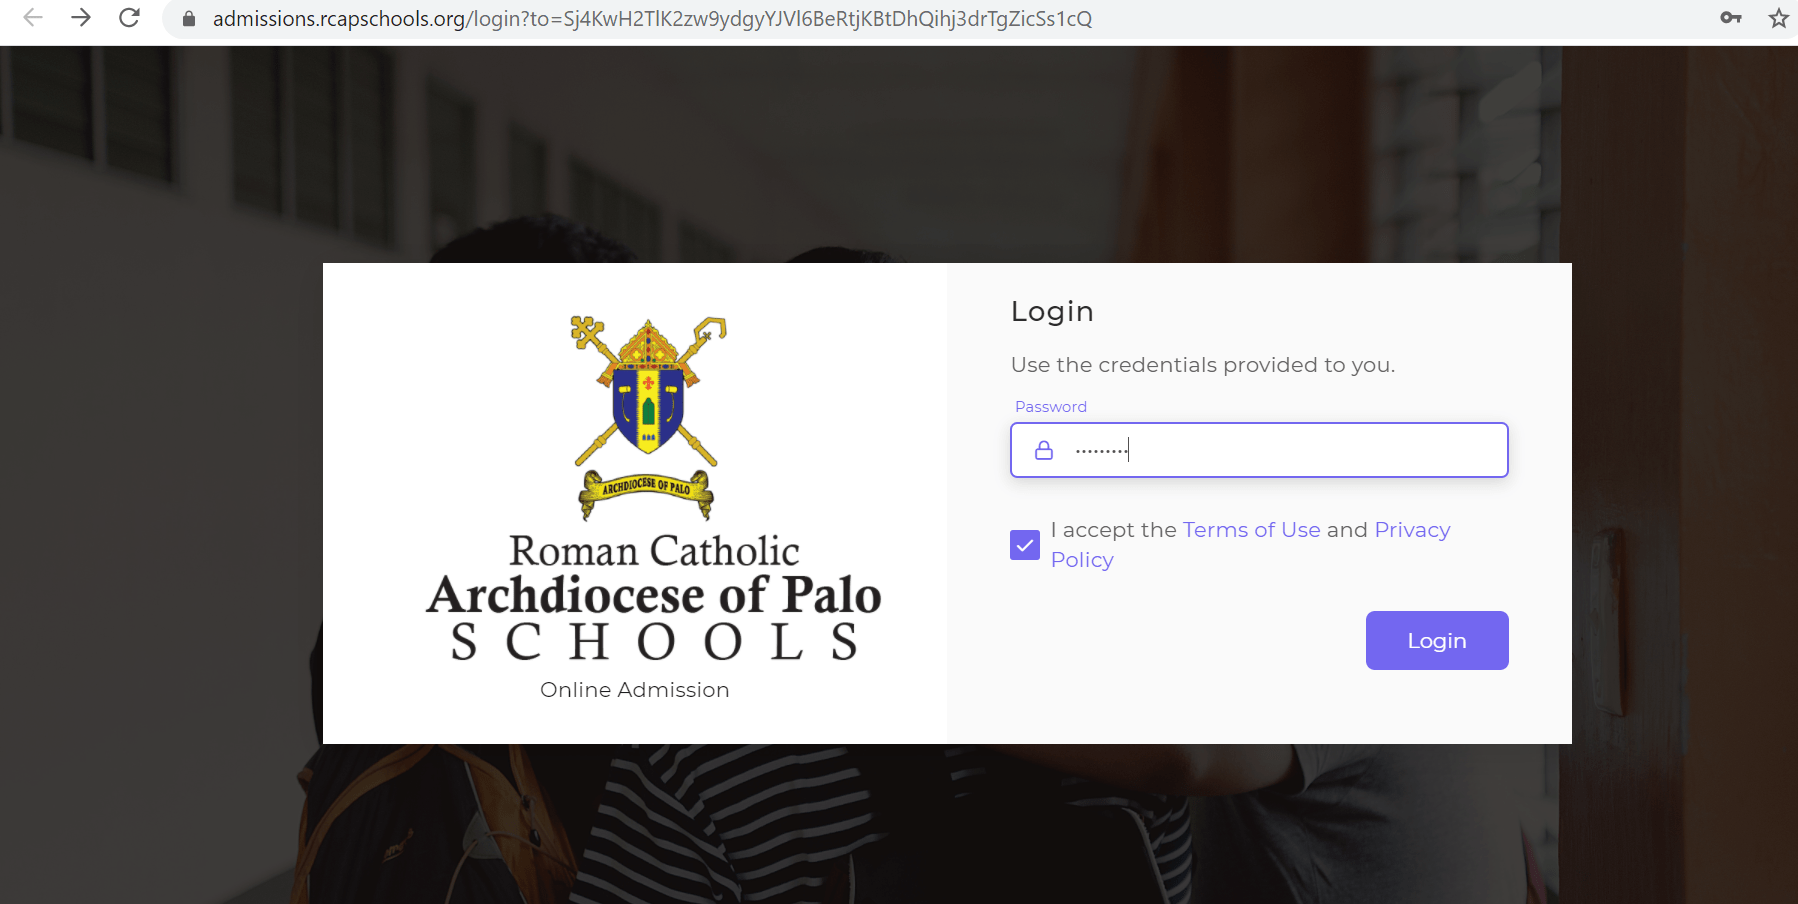
Follow the instructions provided in the email to log in to your account.
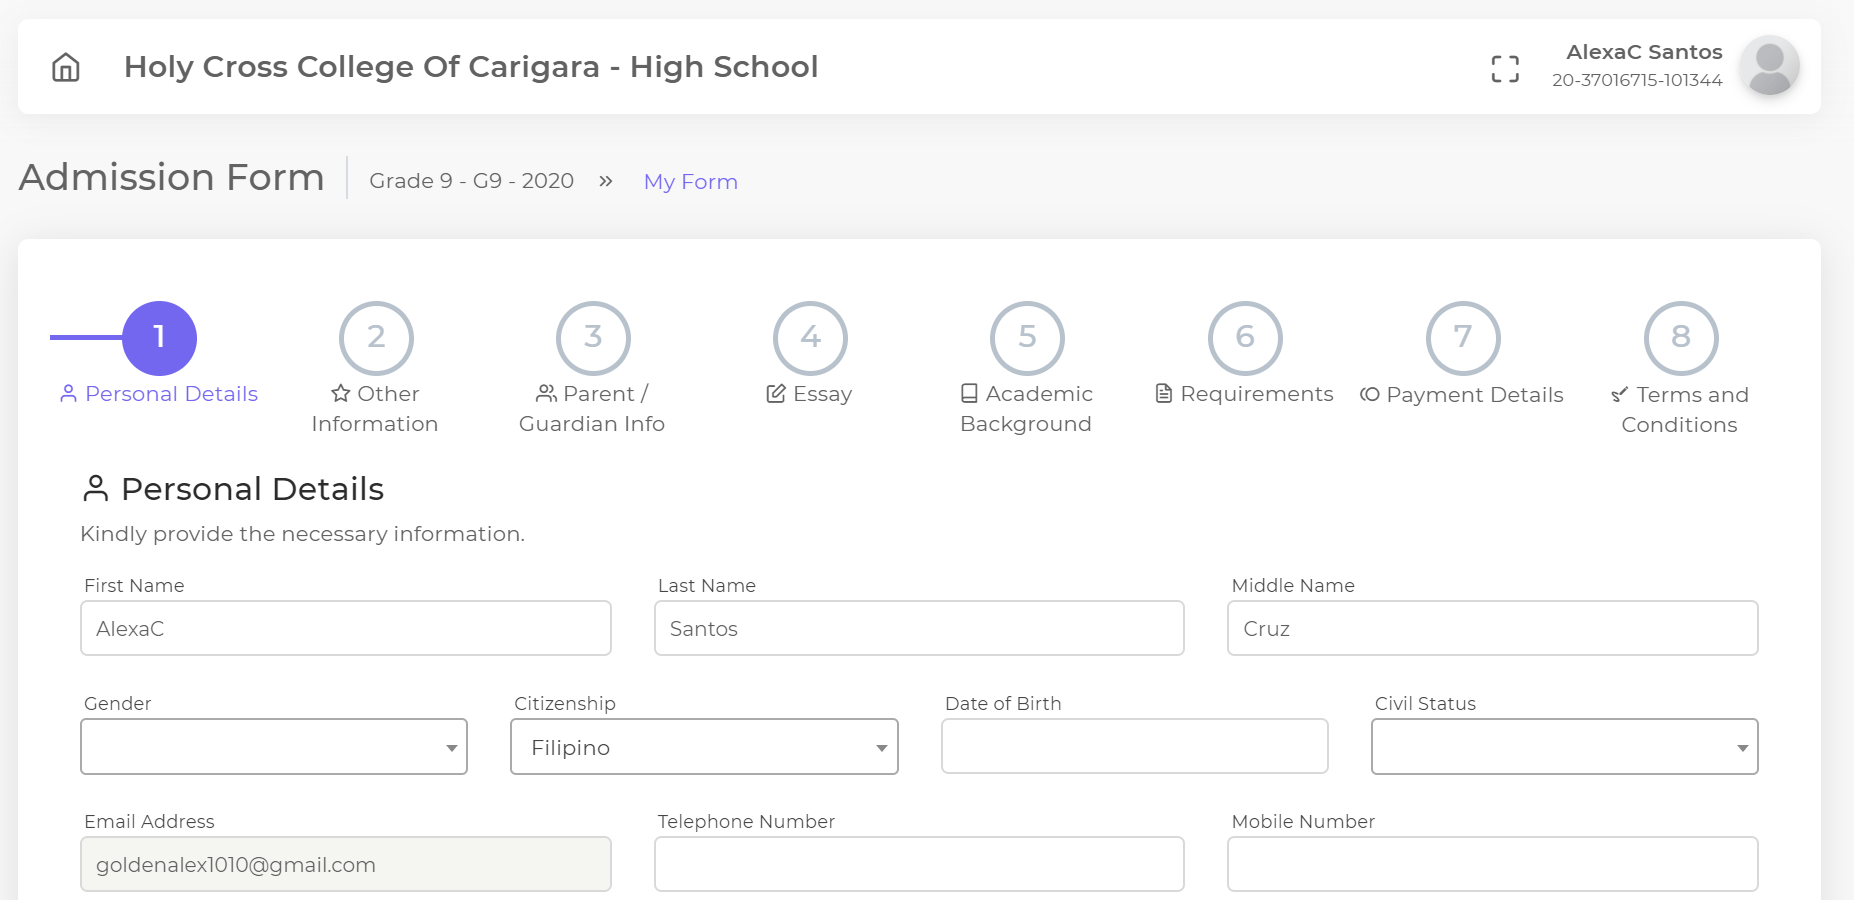
After your successful log in, you will be directed to the Admission Form page. Fill in the required details in Parts 1 through 5. Remember to click “Next” to move to the next part. You can always return to the previous part by clicking “Previous”. In case you are logged out accidentally or otherwise, you can always log back in, and whatever information you typed before clicking “Next” will have been saved by the system. Note that you need to fill in all data fields; if the data requested does not apply to you, type “N.A”.
Note:
In Part 2, in the absence of any admission test taken, please select “Other” in the Admission Test Score drop down menu, type “None” in the Name field, and type any number other than “0” in the Score field.
In Part 3, if the guardian is the same as either the Father or the Mother, please make sure that the details for the Father or the Mother are filled in before clicking the button “same as Father” or “same as Mother”, as the case may be.
In Part 4, if there is no essay question indicated, please skip this part and click “Next” to move to Part 5.
In Part 5, please click Add to reveal the fields you need to fill in. You can add more institutions as needed by clicking Add again.
Note that you need to fill in all data fields in order to proceed to the next parts; if the data requested does not apply to you, type “N.A”.
In Part 6 – Requirements, first click “Download Form” to download your filled-in Application Form. Review the information indicated in the Application Form.
Print a copy of the downloaded Application Form, and have the printed copy signed by all persons required to sign it (note: each page has a signature line). Scan the signed copy of the Application Form, and upload the same in the upload box labeled “Signed Application (PDF)”. ALTERNATIVELY, you can skip the download-print-sign-upload step and instead click Electronic Acceptance.
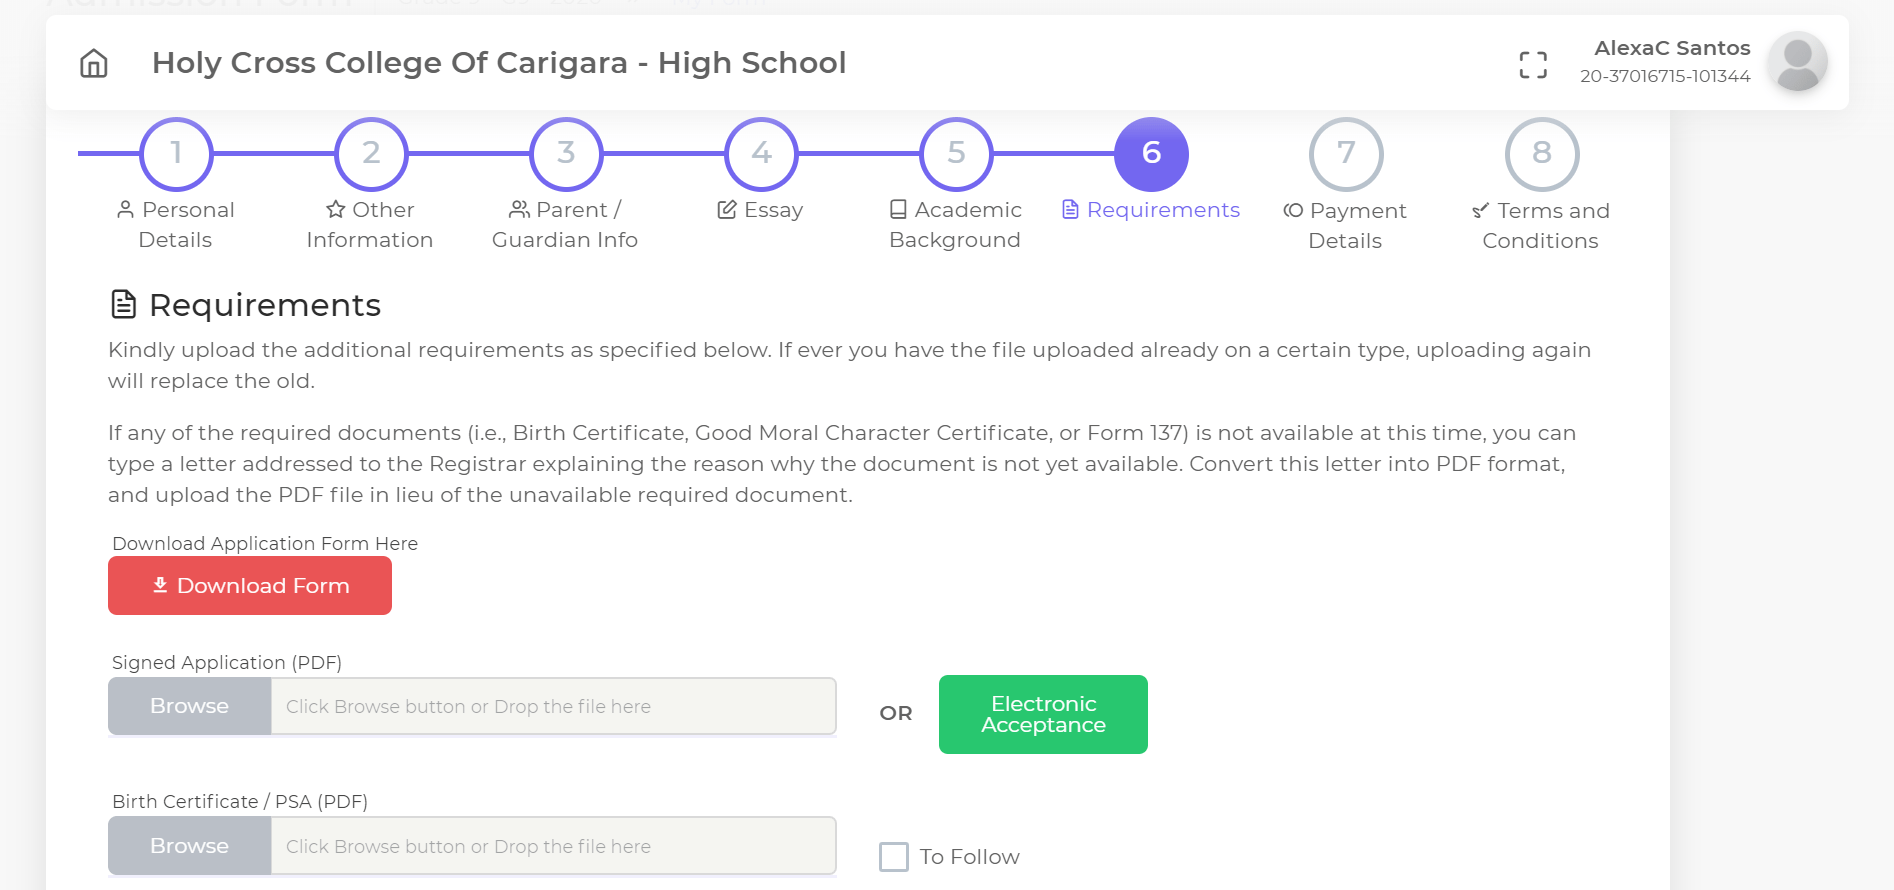
Scan all the other required documents in PDF format, and upload them in the corresponding upload boxes. Note that the required photo to be uploaded must be in JPG format.
If any of the required documents (i.e., Birth Certificate, Good Moral Character Certificate, or Form 137) is not available at this time, you can type a letter addressed to the Registrar explaining the reason why the document is not yet available. Convert this letter into PDF format, and upload the PDF file in lieu of the unavailable required document. ALTERNATIVELY, you can skip the draft-convert-upload step and instead click To Follow.
In Part 7 – Payment Details, if no entrance or admission fee is required, click “Next” to move to Part 8. Otherwise, please indicate payment option.
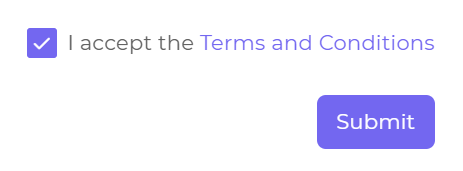
In Part 8 – Terms and Conditions, read the terms and conditions carefully and signify your agreement to the terms by checking the box corresponding to “I confirm that I have read, understand and agree to the above terms and conditions for admission to the [name of school]” located at the bottom. Click “Submit”.
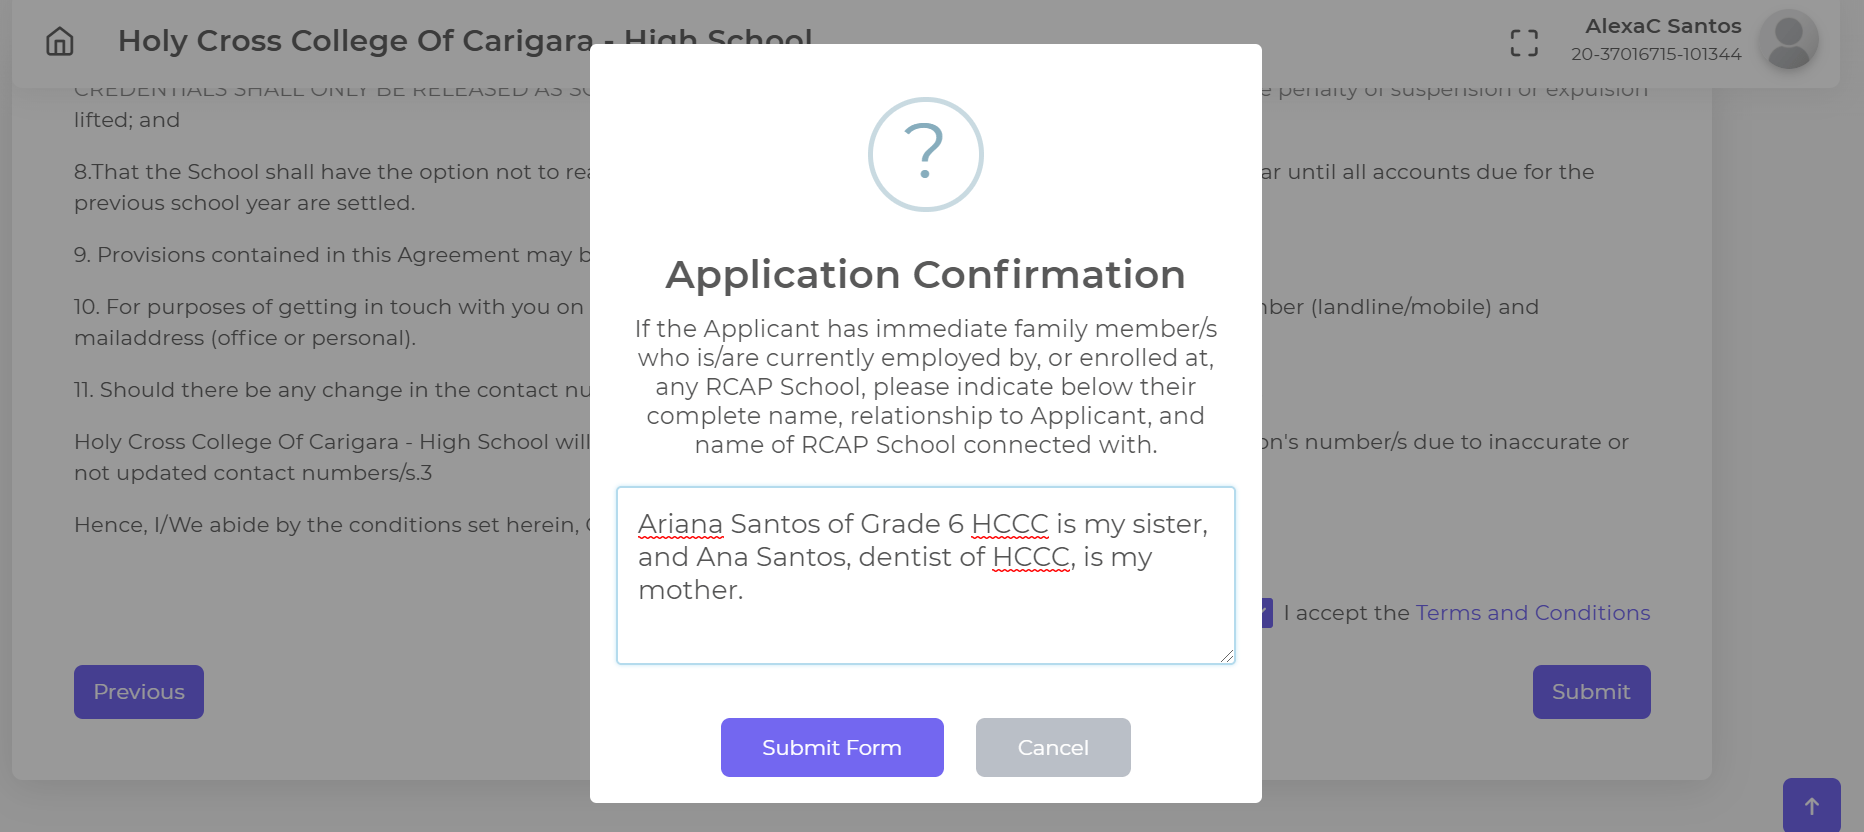
After clicking “Submit”, a pop-up message box “Application Confirmation” will appear. Read the additional instruction in the message, and type your answer in the box below it. See example below. If you have no family member connected to the RCAP Schools, leave the answer box blank. Click “Submit Form” to confirm your application.
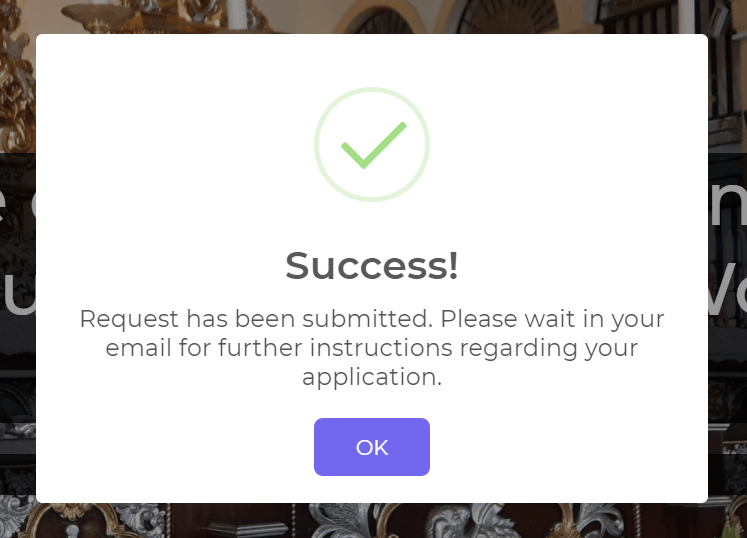
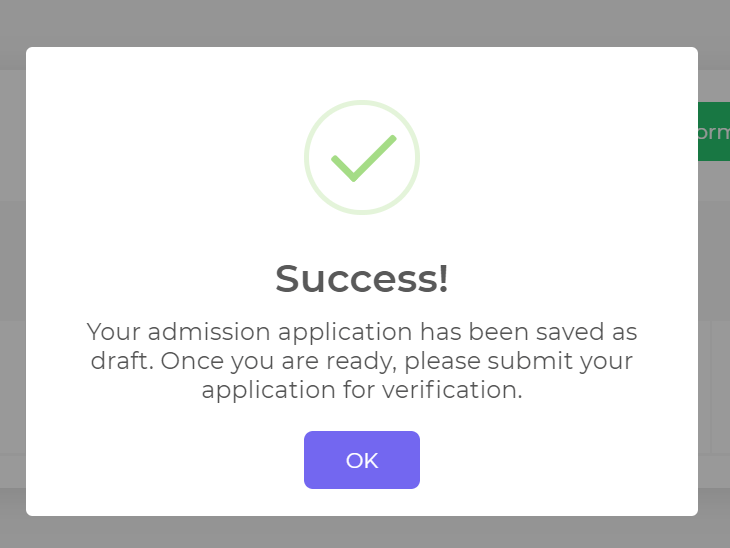
After clicking “Submit Form”, a pop-up message “Success!” will appear. This message will confirm that your Application Form has been saved as a DRAFT. Click “OK”.
Note that the application process is not yet complete, as the form is merely saved as draft. Continue to the next steps.
After confirming application, you will be directed to a page where you can still edit your DRAFT Application Form by clicking “Edit Form”. You can also download your form again by clicking “Download Form”. When you are ready to submit your FINAL Application Form, click “Submit for Verification”. Once you click “Submit for Verification”, your Application Form will then be finally submitted to RCAP Schools for processing; you can no longer edit the same.

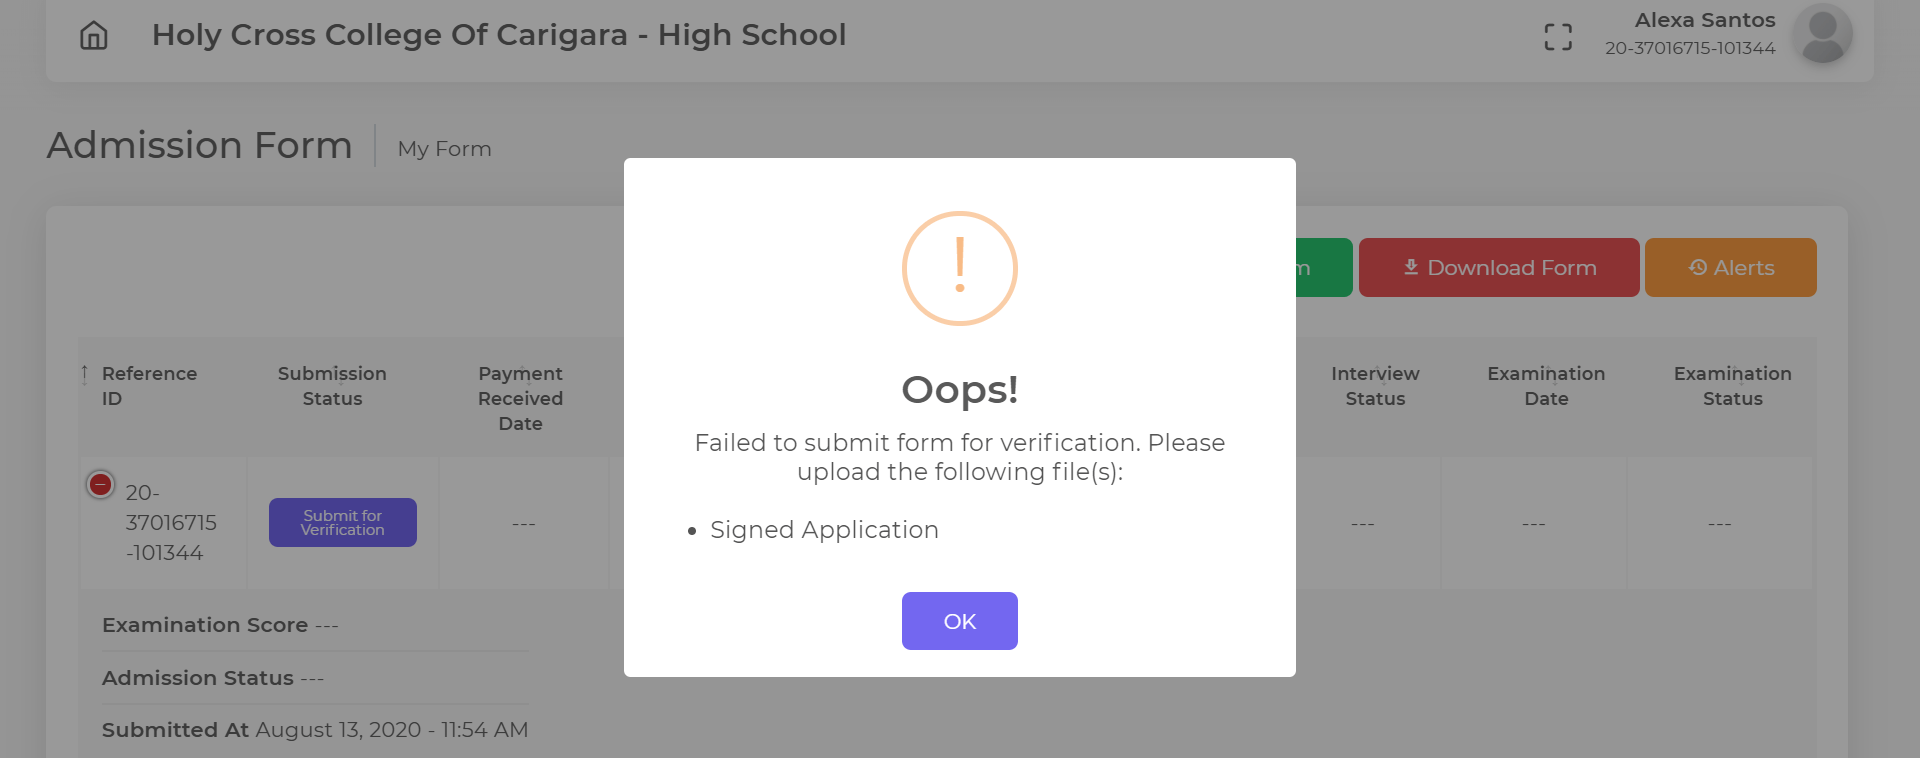
After clicking “Submit for Verification”, it is possible that submission may not be successful due to some incomplete form or missing requirement, in which case you will see a pop-up message similar to the image below. Follow the instruction stated in the message, and then click “Submit for Verification” again.
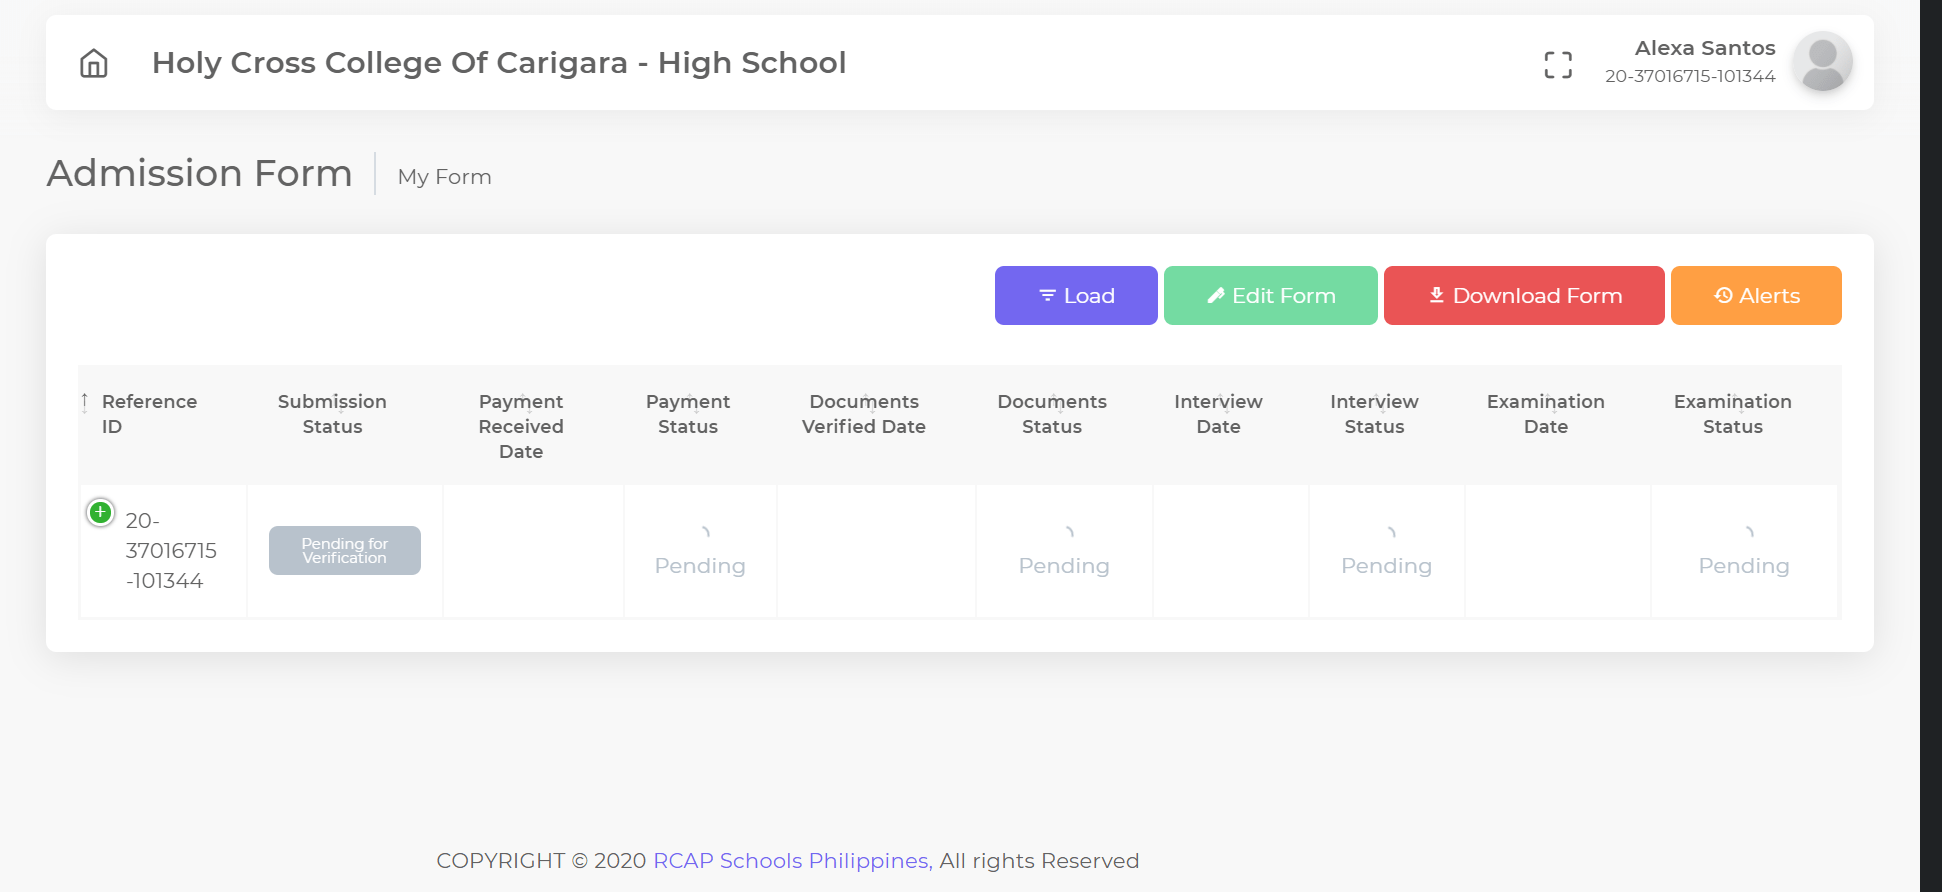
If the submission is successful, you will see a notice confirming that your application for admission has been submitted for verification process, as follows:

RCAP Schools will verify your application form, submitted documents, and payment (if applicable).
If your application requires an admission test, interview/s, or any other preliminary step, you will be notified accordingly.
To check status of your application for admission, simply log in again using the same user credentials provided to you in the initial email. Click on the icon next to your name in the upper right corner to show a drop-down menu. Click “Form Status”.

If your application is still under processing, you will see corresponding updates under various requirements. Moreover, the update appearing under “Submission Status” will show “Pending for Verification”.
If your application for admission is accepted, you will receive an email with your assigned Student ID Number and password, as well as further instructions regarding registration.